
You can attach screen captures to provide additional information the payor may require for specific procedures. This helps reduce the number of rejected claims due to missing attachments and supporting documentation.
To attach a screen capture
1. Double-click an insurance claim in the transaction log.
The Dental Insurance Claim window appears.

2. Under Attachments, click Include Attachments.
The Include Attachments dialog box appears.

3. In the Attach From list, select Screen Capture, and then click the Chevron icon.
The Screen Capture dialog box appears.

4. To set up the default settings for screen captures, click the Setup icon.
The Setup Acquisition Method Defaults dialog box appears.
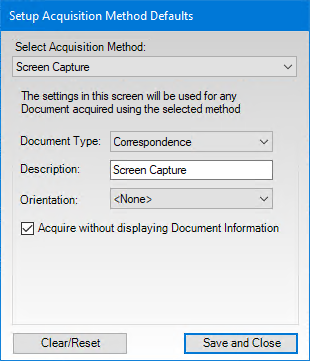
5. Do the following, and then click Save and Close:
· Select Acquisition Method - Select a method, such as Screen Capture, from the list.
· Document Type - Select a type from the list.
· Description - Type a description of the item you want to capture.
· Orientation - Select an orientation, such as Entire Mouth, from the list.
· (Optional) Acquire without displaying Document Information - Clear to display the Document Information dialog box.
6. To capture the image that you want to include with the insurance claim, click Start Capture.
The file is added to the list in the Include Attachments dialog box.
7. To include a note or to change the attachment type in the Include Attachments dialog box, select an attachment from the list and click the Attachment Information icon.
The Attachment Information dialog box appears.

8. Type a note of up to 255 characters.
9. Select an attachment type and orientation from their respective lists, and click OK.