You can use the Scheduled Production Forecast to view scheduled production in the Appointment Book versus daily and monthly goals. You can preview, print, or send via email previously generated reports at any time after you have generated them.
To run a Scheduled Production Forecast
1. In the Office Manager toolbar, click Analysis, and then click Dentrix Reports.
The Dentrix Reports window appears.
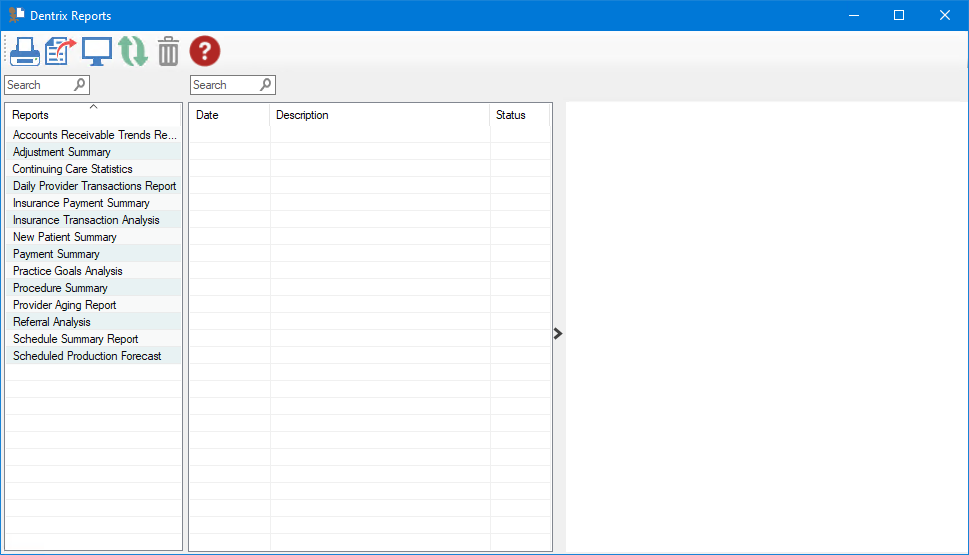
2. Under Reports, double-click Scheduled Production Forecast.
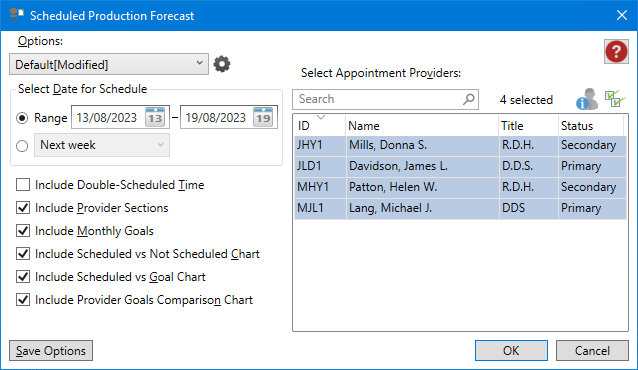
The Scheduled Production Forecast dialog box appears.
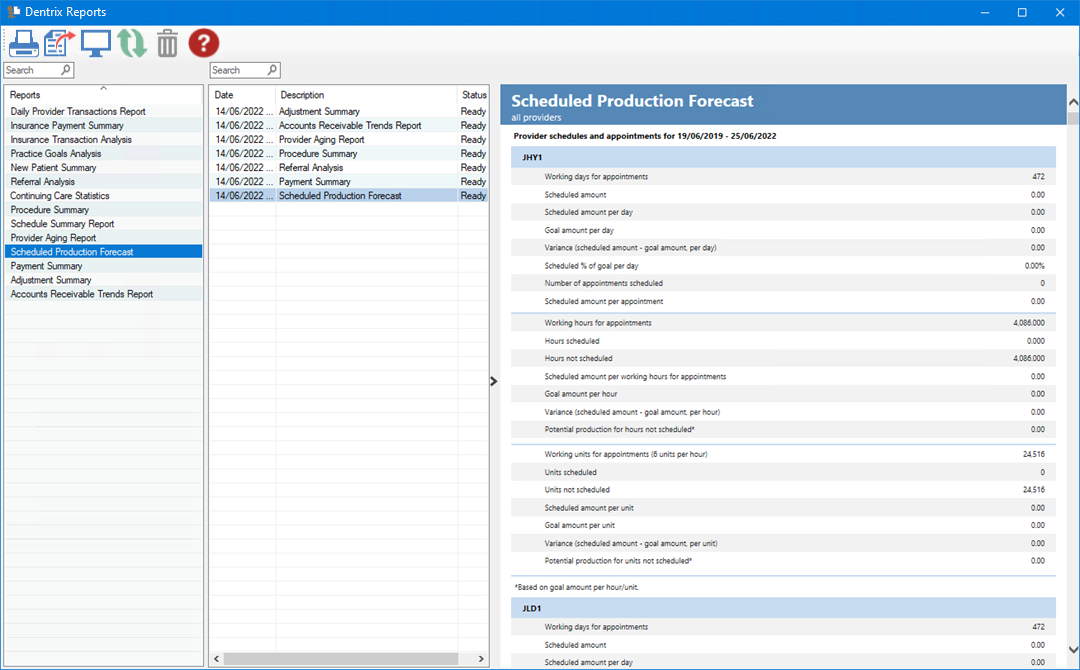
3. To run the report with the default settings, click OK.
The Scheduled Production Forecast is listed, and a preview of the forecast appears.
Note: To view the data, you may need to enlarge the Dentrix Reports window, and go to the end of the report to view any graphs or charts.
4. To modify the default settings in the Scheduled Production Forecast dialog box, do one or more of the following:
Select Date for Schedule – You can set a specific date range or select a set of interval options.
Range – Enter the start and end dates, or click the date icon, and then select the date from the calendar.
Date options – Defaults to the Next week. Other options include:
Today – Generates a forecast for the current day.
Tomorrow – Generates a forecast for tomorrow.
Next month – Generates a forecast for next month.
Next 3 months – Generates a forecast for the next 3 months.
Next 6 months – Generates a forecast for the next 6 months.
Next 12 months – Generates a forecast for the next 12 months.
Include Double-Scheduled Time – Select to include double scheduling data.
Include Provider Sections – (Default) Select to include totals for each selected provider.
Include Monthly Goals – (Default) Select to include monthly goals itemized for each month within the range selected.
Include Scheduled vs Goal Chart – (Default) Select to include a graph showing scheduled production versus production goal.
Include Provider Goals Comparison Chart – (Default) Select to include a graph showing individual provider goals as a percentage of the total production goal.
Select Appointment Providers – Defaults to all providers. To change the default, click the Select all icon  , and then select the providers that you want to include in the report. Or, type the provider's name in the Search text box.
5. To save any changes you made to the default settings, click Save Options.
6. To manage any saved options, click the Manage Saved Options icon  .
.
The Manage Options dialog box appears.
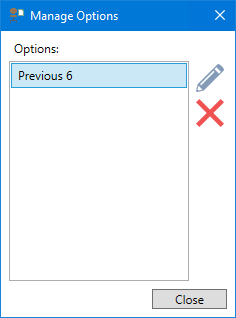
7. Do one of the following:
To rename the option, select it, click the Rename Selected Item icon, and then type a new name.
To delete the option, select it, and then click the Delete Selected Item icon.
Important: You can only rename or delete options that you have created.