
The Auto-State button on the Charting toolbar provides you with a fast and convenient method of charting pre-existing conditions or treatment performed by a previous provider, treatment that you recommend, and treatment that you complete. With the Auto-State button, you can chart several procedures at once rather than one at a time.
To chart using the Auto-State button
1. Select a patient.
2. If the treatment you are entering requires a tooth number, click the appropriate tooth or teeth from the Graphic Chart.
3. Click the Auto-State button in the Charting toolbar.
4. Click the appropriate status button for the procedure you are entering:
· Click the Existing Other button to enter existing work performed by a provider outside of your practice.
· Click the Existing button to enter existing work performed by you or a provider from your practice.
· Click the Treatment Plan button to enter recommended treatment for a patient.
· Click the Completed button to enter conditions or work you complete for a patient.
Note: By default, Dentrix selects the Treatment Plan button. The status buttons remain selected until you click one of the other status buttons.
5. Select the appropriate procedure code information from the Procedure Buttons or Procedure Codes panels.
If the procedure you selected requires further treatment information, such as surfaces or quadrants, the Select Surface dialog box appears.
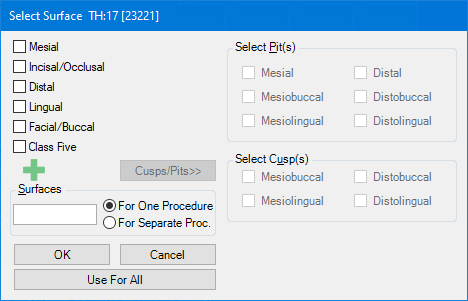
6. Select the appropriate treatment areas, and then click OK.
Dentrix adds the procedure to the Graphic Chart if you are using a charting symbol in conjunction with the posted procedure and to the patient's Progress Notes. Dentrix also automatically posts all completed and treatment-planned work in the Patient Chart to the Ledger and adds the appropriate charges and estimates to the patient's account respectively.
Note: If you post a treatment as separate procedures, Dentrix posts any surfaces that are separated by a comma as separate procedures.