TWAIN Rotation Setup Guide
In Dentrix Ascend Imaging, templates will automatically rotate an image based on the tooth numbers and the orientation of the slot (portrait or landscape). For this automatic rotation to work, it is assumed that a given image has been acquired with the cable side of the sensor down.
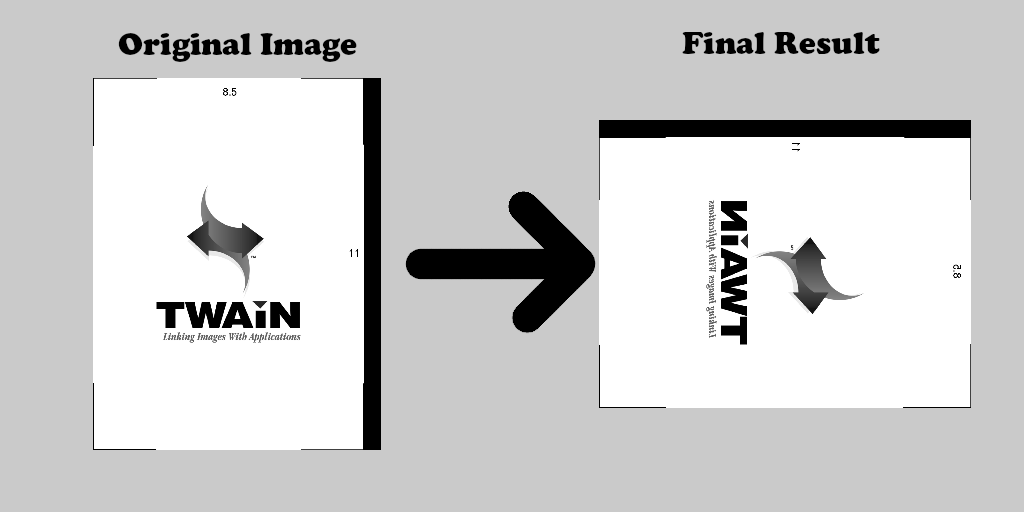
Let's start with the following layout as an example.

Assuming that the correct tooth numbers are assigned to each of the template slots, the image from the sensor will be rotated automatically as depicted in the following image.

If an image from a TWAIN source does not have the proper rotation applied when it is put into the template, try the following:
Note: When you troubleshoot TWAIN rotation issues, you should use the Intraoral Periapical Image procedure and assign tooth numbers 8 and 9 to it. This way no automatic rotation is applied during troubleshooting.
-
Open the Acquisition Agent preferences by right-clicking the icon in the system tray and then selecting Preferences.

-
Select the TWAIN tab.

-
Under TWAIN Rotation, select a TWAIN source from the Device list.

-
Select which acquisition type is being affected.

-
Select the a rotation option: Rotate 90, Rotate 180, or Rotate 270.

If an image needs to be flipped or mirrored in some way, try a different option: Mirror, Rotate 90 + Mirror, Flip, or Rotate 90 + Flip.
Notes:
-
The Mirror option flips the image horizontally from the default way the TWAIN source passes the image.
-
The Rotate 90 + Mirror option first rotates the image 90 degrees clockwise from the TWAIN default and then mirrors the rotated image.
TWAIN transformation examples:
-
No Rotation

-
Rotate 90

-
Rotate 180

-
Rotate 270

-
Mirror

-
Rotate 90 + Mirror

-
Flip

-
Rotate 90 + Flip
-