Deleting exceptions in coverage tables
You can delete exceptions in a coverage table that is attached to an insurance plan.
Notes:
-
Deleting exceptions in coverage tables for insurance plans requires the "Edit Insurance Plans" security right.
-
You can also delete exceptions in any of the coverage table templates.
To delete an exception
-
On the Home menu, under Insurance, click (or tap) Carriers.
The Insurance Carriers page opens.
-
Select an insurance carrier.
The options for editing the insurance carrier become available.
-
Under Plans/Employers, select an insurance plan.
The options for editing the insurance plan become available.
-
Click (or tap) Coverage Table.

The Coverage Table dialog box appears.

Insurance Coverage, %

Patient Copayment, $
-
Click (or tap) Manage Exceptions.

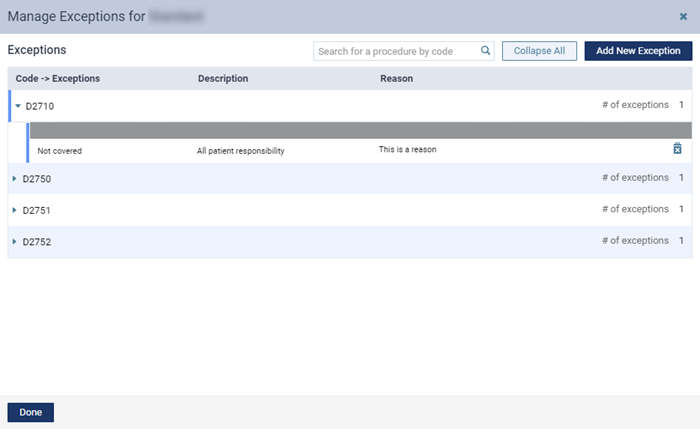
The Manage Exceptions dialog box appears.

-
In the Exceptions list, expand a Code to view the corresponding exceptions, and then click (or tap) an exception's Delete button
 .
.Notes:
-
To search for a procedure code, begin entering a code in the Search for a procedure by code box, and continue typing as needed to narrow the list.
-
If at least one Code is expanded, to quickly collapse them all, click (or tap) Collapse All. If they are all collapsed, to expand them all, click (or tap) Expand All.
A confirmation message appears.
-
-
Click (or tap) Delete.