Creating patient forms
You can create patient forms as needed.
Notes:
-
You can create forms for new patients and existing patients.
-
You can create consent forms for new patients and existing patients.
-
You can provide a terms of use consent form that patients have to acknowledge to use the online portal.
To create a patient form
-
On the Settings menu, under Patient Care, select Form Builder.
The Patient Forms page opens on a new browser tab.
-
Click (or tap) Create Form.

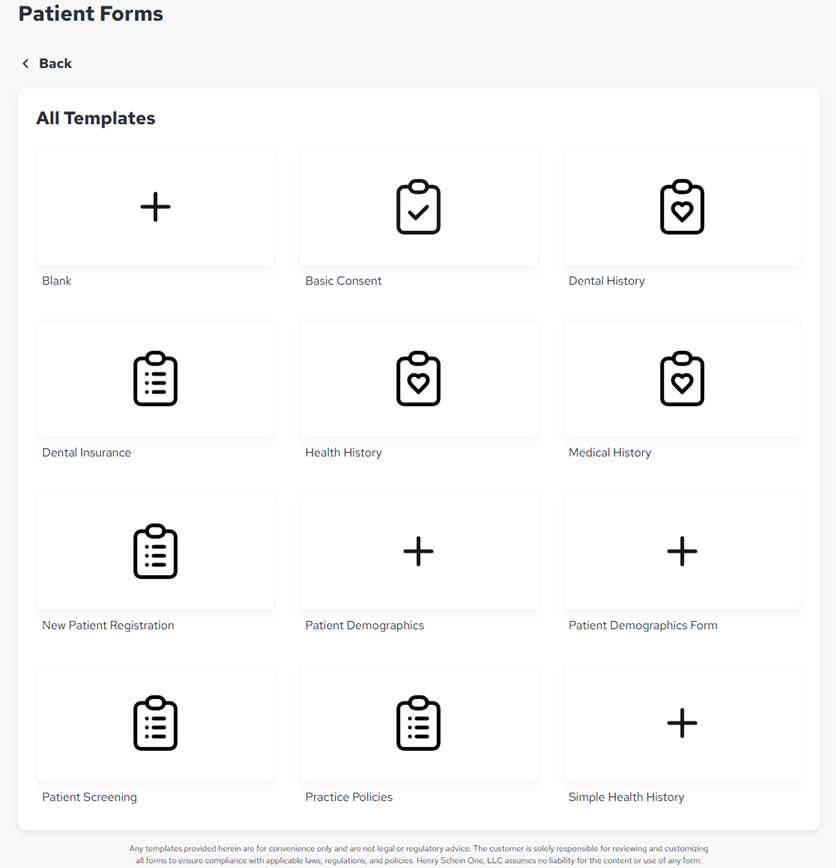
The All Templates options appear. You can create a form, starting from scratch or using a template.
-
Click (or tap) Blank (to build a form from scratch) or one of the templates (Basic Consent, Dental History, Dental Insurance, Health History, Medical History, New Patient Registration, Patient Demographics, Patient Demographics Form, Patient Screening, Practice Policies, or Simple Health History).
Disclaimer: The templates provided are for convenience only and are not legal or regulatory advice. You are solely responsible for reviewing and customizing all forms to ensure compliance with applicable laws, regulations, and policies. Henry Schein One, LLC assumes no liability for the content of use of any form.
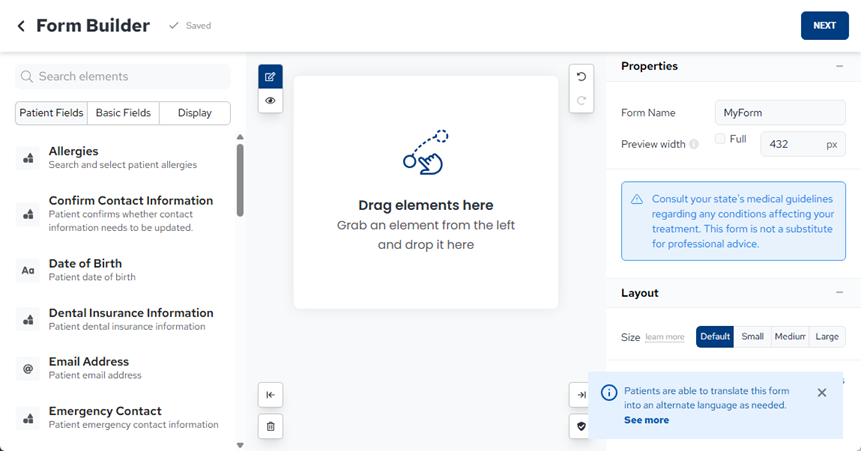
The Form Builder page opens.
-
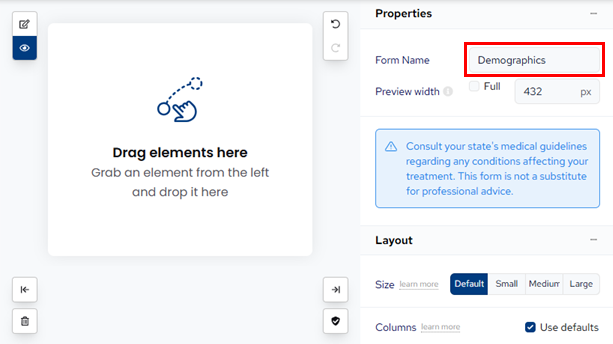
With the form container selected (not an element on the form), under Properties, enter a Form Name.
-
Perform any of the following tasks to build/modify the form:
-
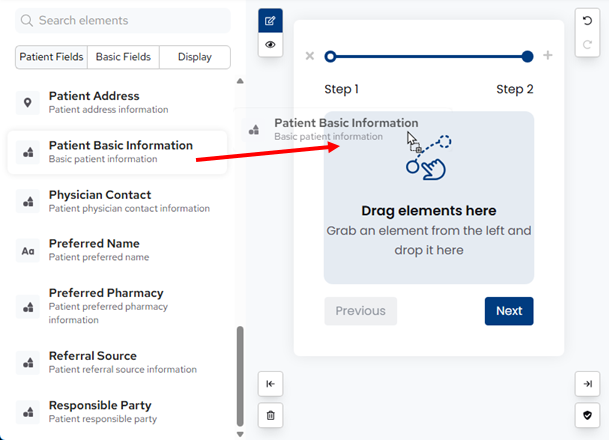
You can drag a Display element, such as Steps, to the form.

-
You can drag a Patient Fields element, such as Patient Basic Information, to the form.
Note: If a patient completes and submits a form that contains certain Patient Fields elements, the information from those fields can update the patient's record. Currently, the following fields allow automatic write-back or synchronization:
-
Patient Basic Information - Preferred Name, Email Address, Mobile Phone, and Address only.
-
Preferred Name.
-
Patient Address.
-
Email Address.
-
Mobile Phone.
-
Allergies.
-
Medical Conditions.
-
Medications.
-
-
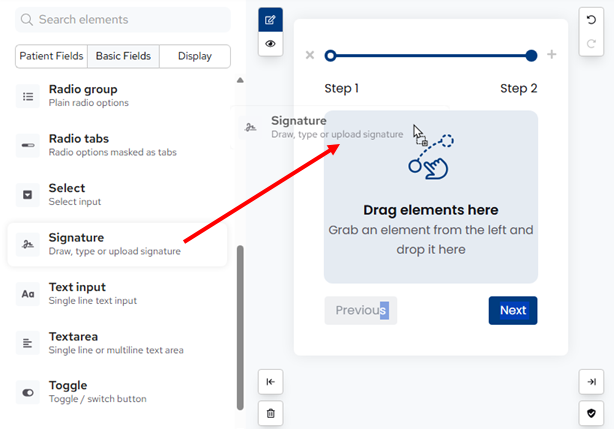
You can drag a Basic Fields element, such as Signature, to the form.
-
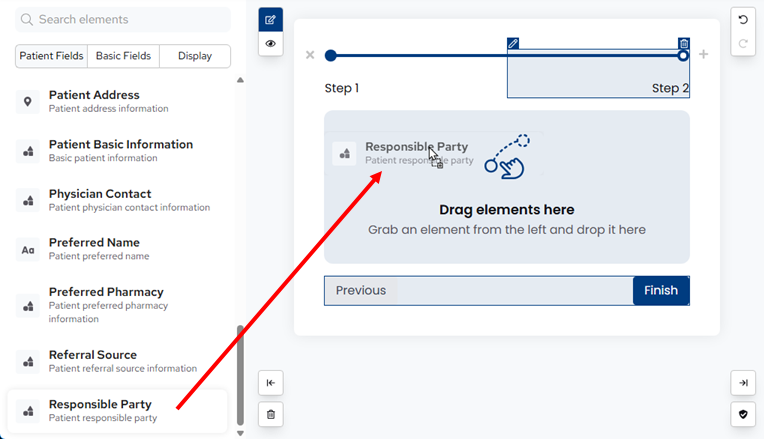
To view a different step, select it.

Then, you can drag another element, such as Responsible Party, to that step of the form.
-
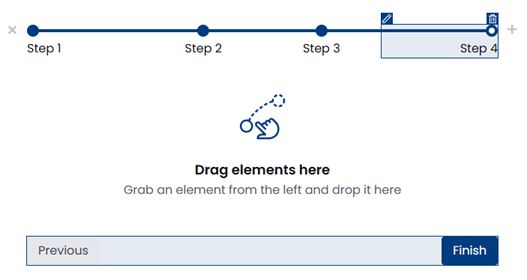
To add a step, click the Add icon (plus sign).


-
Add other steps and elements as needed.
Notice that, with tabs and steps, a Finish button is included automatically for the last item.
-
If you do not use steps or tabs, you must add a Submit button manually. Drag it from the Static elements list to the form.

Important: If the form includes steps or tabs, a Submit button is added automatically to the form. However, if the form does not include steps or tabs, and you do not add a Submit button manually, patients will not be able to submit the form after completing it, so remember to include this element.
-
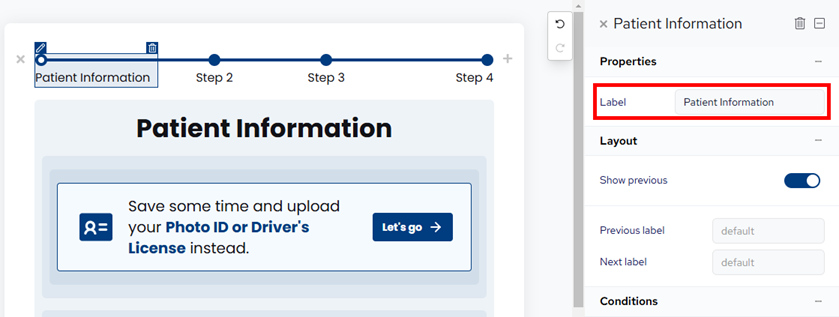
To change the label of an element, such as a step, select it, and then change the Label.
-
Here are some examples of changes you can make to elements:
-
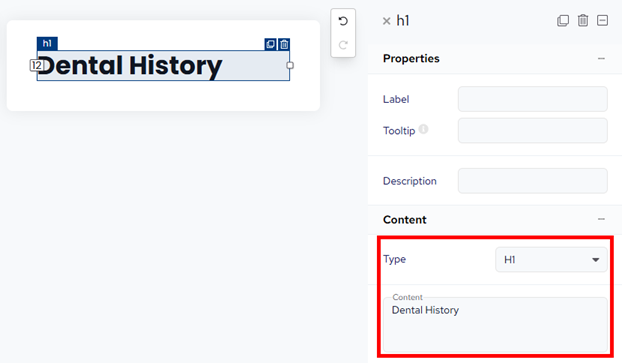
Type and Content (for a heading).
-
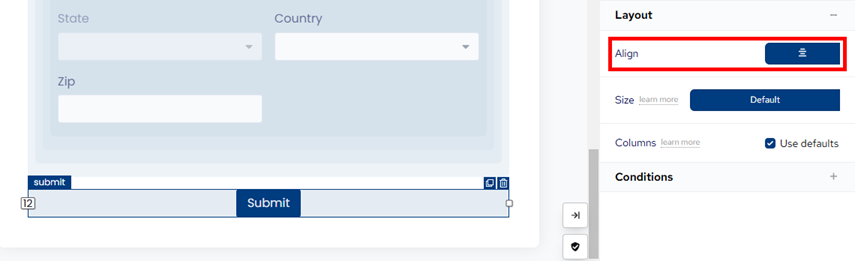
Align (centered on form).
-
Required (a response is required).

-
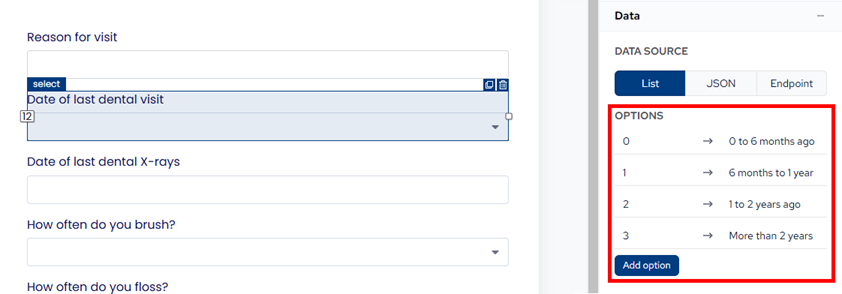
List of selections (in this example, only one option can be selected). For the first option, enter a value and a label; for each subsequent option, click (or tap) Add option, and then enter a value and a label.
-
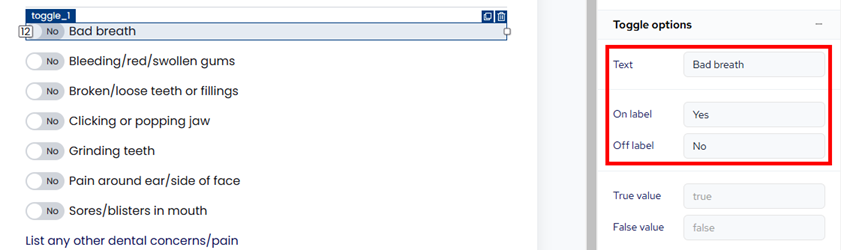
Text, On label, and Off label (for toggle/switch)
-
-
To resize an element, drag its edge to the left or right.

-
To remove an element, select it, and then click (or tap) the Remove button (trash can icon).

-
The vertical toolbar to the left of the preview area allows you to switch from editing the form to previewing the final look and functionality of the form.
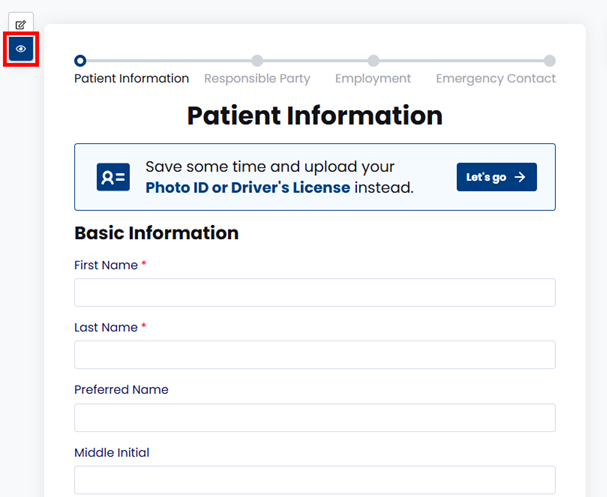
-
-
Click Next.

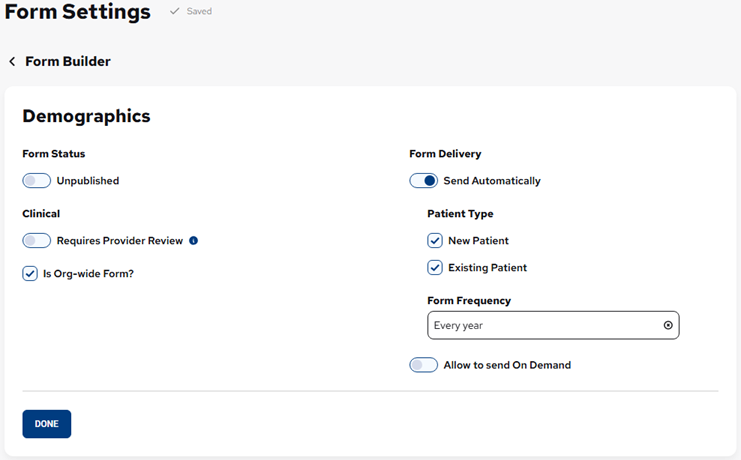
The Form Settings page opens.
-
Set up the following options:
-
Form Status - If you want to publish the form immediately upon saving it, turn on the switch (the label changes to Published); otherwise, leave the switch off (the label remains Unpublished).
-
Clinical - If you want to require that the form to be reviewed by a provider, turn on the Requires Provider Review switch; otherwise, leave the switch off.
-
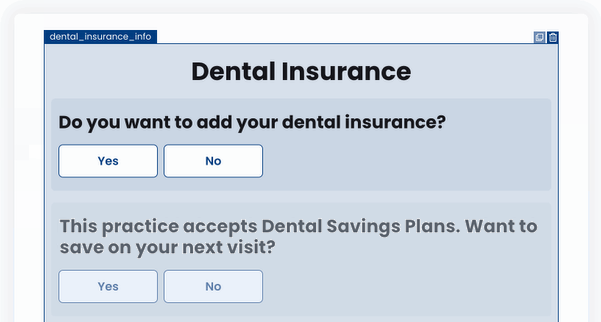
DentalPlans Integration - If you want the form to include an option for a patient to consent to receiving information about dental savings plans (DSPs) from DentalPlans.com, turn on the Offer DentalPlans.com options to patients without insurance switch; otherwise, turn off the switch.
Notes:
-
This option is available only if at least one location is a participating provider with DentalPlans.com.
-
With this option turned on, for the dental savings plan question to appear on the patient form, the form must include the "Dental Insurance Information" element.
-
The dental savings plan question is presented on the patient form when a patient indicates that he or she does not have dental insurance. If the patient opts in, the patient's contact information and consent are captured, and DentalPlans.com sends the available plan options to the patient. You can enable or disable the dental savings plan question for patient forms as needed.
-
Benefits of enabling the integration and offering dental savings plans:
-
For patients - Affordable care options at the right time, reducing financial barriers.
-
For practices - Higher case acceptance, improved patient loyalty, and new revenue opportunities.
-
-
-
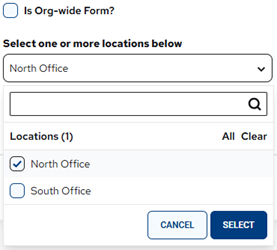
Is Org-wide Form? - If the form is for all locations, leave the checkbox selected. However, if the form is only for specific locations (it applies only to patients whose preferred location is one of the selected locations), clear the check box; on the Select one of more locations below list, select the checkbox of each applicable location; and then click (or tap) Select.
-
Form Delivery:
-
Send Automatically - If you want the form to be sent automatically, leave the switch on (the Patient Type and Form Frequency options are available); otherwise, turn off the switch (the Patient Type and Form Frequency options become unavailable because they are not relevant).
With the switch on, specify which patients are eligible to receive the form automatically and how often:
-
Patient Type - This determines which patients the form will be due for:
-
New Patients - The form is for any patient whose status is "New" in Dentrix Ascend.
-
Existing Patients - The form is for any patient whose status is anything other than "New" in Dentrix Ascend.
Note: With the switch on, at least one Patient Type must be selected to save the form's settings.
-
-
Form Frequency - This determines how often patients must complete the form. Select one of the following frequencies: One time, Every appointment, Every 3 months, Every 6 months, Every year, or Custom (select Days, Weeks, Months, or Years; and enter the applicable number).
Note: Turning off the Send Automatically switch does not erase previously saved Patient Type and Form Frequency values.
-
-
Allow to send On Demand - If you want to allow the form to be requested on an as-needed basis so the form is not limited to a frequency, turn on the switch; otherwise, leave the switch off.
Note: After a patient completes an on-demand form, the Due Date is updated: according to the specified Form Frequency, either the date when the form is next due or "Does Not Expire" appears; or if the form has not been assigned a Patient Type (New Patient or Existing Patient is not selected), "Disabled" appears.
-
-
-
Click (or tap) Done.
You are returned to the Patient Forms page, and the form you created appears in the Forms list.

Note: If the Status of the form is "Unpublished," it will never be due for any patient and cannot be requested on demand.