By default, each case includes four case presentation items:
Case Detail
Patient Chart (Arch View)
Patient Chart (Charting View)
Informed Consent Forms
You can add or remove case presentation items from a case presentation. You can add or remove charting views, snapshots, patient education topics, images, and consent forms.
To set up a default case presentation outline
1. In the Treatment Planner, click the Case Presentation Setup tab, in the toolbar, click the Case Presentation Outlines button, and then in the menu, click Case Presentation Outline Setup.
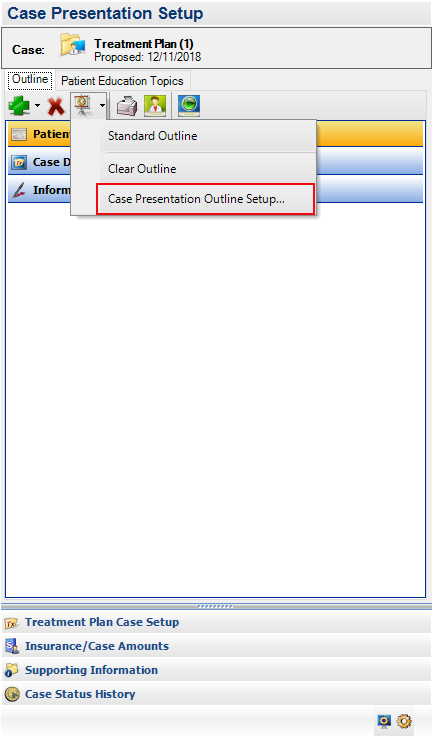
The Case Presentation Outline Setup dialog box appears.
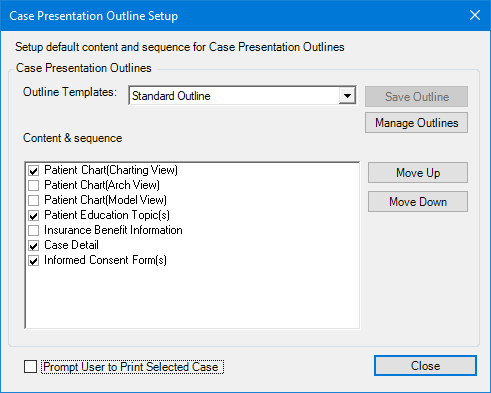
2. Select the content that you want to include in the outline, or clear the check box for any content that you do not want to include.
3. Click Move Up or Move Down to arrange the sequence of the content you selected.
4. To print the selected case whenever you modify or close it, select Prompt User to Print Selected Case.
5. Click Save Outline.
The Save Outlines dialog box appears.
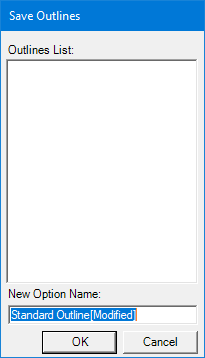
6. Type a name for the new outline template and click OK.
7. Click Close.
The Case Presentation Outline Setup dialog box closes.