You can print a treatment case and customize the data that appears on it. If you have scheduled an appointment for a treatment-planned procedure, the appointment date now appears in the treatment case report.
To print a treatment case
1. In the Patient Chart or the Ledger, select a patient, and then start the Treatment Planner.
The Treatment Planner window appears.
2. In the File menu, point to Print, and then click Print Treatment Case.
The Print Treatment Case dialog box appears.
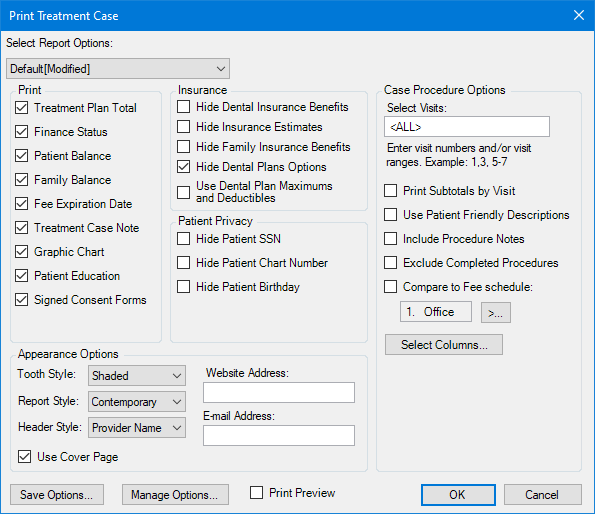
3. In the Select Report Options list, select the option profile that you want to use for the report.
4. In the five group boxes, select the information that you want to include in the Treatment Case Report:
Print - Select any one or all of the following: Treatment Plan Total, Finance Status, Patient Balance, Family Balance, Fee Expiration Date, Treatment Case Note, Graphic Chart, Patient Education, and Signed Consent Forms.
Insurance - Select any one or all of the following: Hide Dental Insurance Benefits, Hide Insurance Estimates, Hide Family Insurance Benefits, Hide Dental Plans Options, and Use Dental Plan Maximums and Deductibles.
Patient Privacy - Select any one or all of the following: Hide Patient SSN, Hide Patient Chart Number, and Hide Patient Birthday.
Case Procedure Options - Select from the following visit-specific information: Print Subtotals by Visit, Use Patient Friendly Descriptions, Include Procedure Notes, Exclude Completed Procedures, and Compare to Fee schedule. You can also have the report compare the current fee schedule to a selected fee schedule. Click Select Columns to indicate which columns you want displayed on the report: Date, Visit, Tooth, Surface, Procedure Code, Provider, Description, Appointment Date, Fee, Patient Portion, Primary Insurance Portion, and Secondary Insurance Portion. (You can click the Hide and Show buttons to exclude and include the columns on the report too.)
Appearance Options - Do the following:
Tooth Style – Select the appropriate tooth style from the list.
Report Style – Select the appropriate report style from the list.
Header Style - Select the name that you want to appear on the report from the list.
Website Address – Type your practice's website address.
E-mail Address – Type your practice's email address.
Use Cover Page - Select to add a cover page to the report.
5. To save your custom report settings, click Save Options.
The Save Options dialog box appears.
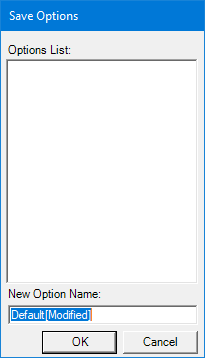
6. Under New Option Name, type a name and click OK.
7. To delete a saved options profile, click Manage Options.
The Manage Saved Options dialog box appears.
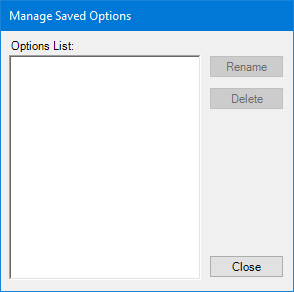
a. Select the profile that you want to delete from the Options List, and then click Delete.
b. To rename a saved profile, select the option name from the list, click Rename, and then type the new name.
8. To preview the report before printing it, select Print Preview in the Print Treatment Case dialog box.
9. Click OK to print or preview the report.