
You can send billing statements from several places within Dentrix.
To send a statement electronically
1. Do one of the following:
From Office Manager’s Billing Statements dialog box, select the Send Electronically option when generating statements.
In Office Manager, click the Electronic Billing Submission toolbar button.
In Office Manager with the generated billing statements selected from the Batch Processor, from the File menu, click Electronic Billing Submission.
With a patient selected in the Ledger, click Print, click Statement, and then click Send Electronically.
In the Ledger’s Batch Insurance Payment Entry dialog box, click Generate Statements for posted claims, and then select Send Electronically.
Note: If you did not select Verify Billing Statements to Send in the Office Manager’s Preferences dialog box (Maintenance > Practice Setup > Preferences), the statements are sent electronically using the delivery method (Mail, Email, and/or Text) specified for the practice in QuickBIll Settings or for the family in the Family File.
2. If you selected Verify Billing Statements to Send in the Office Manager’s Preferences dialog box, the Verify Statements to Send window appears.
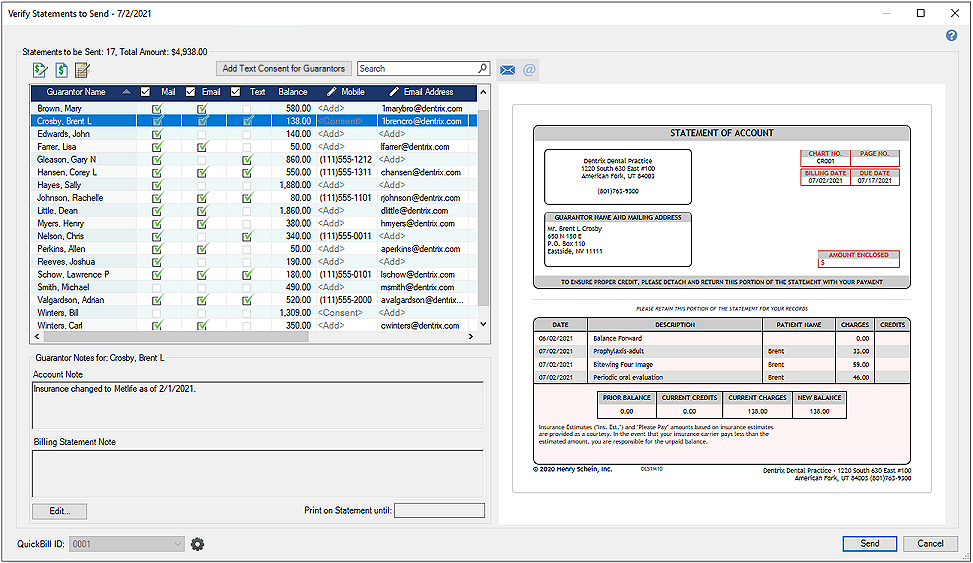
From the Verify Statements to Send window, you can do the following:
Easily review and verify statements before sending them electronically.
Verify or change the delivery method for your electronic statements: Mail, Email, and/or Text.
Verify details for the statement, as necessary, from the searchable and sortable data grid or the statement preview pane.
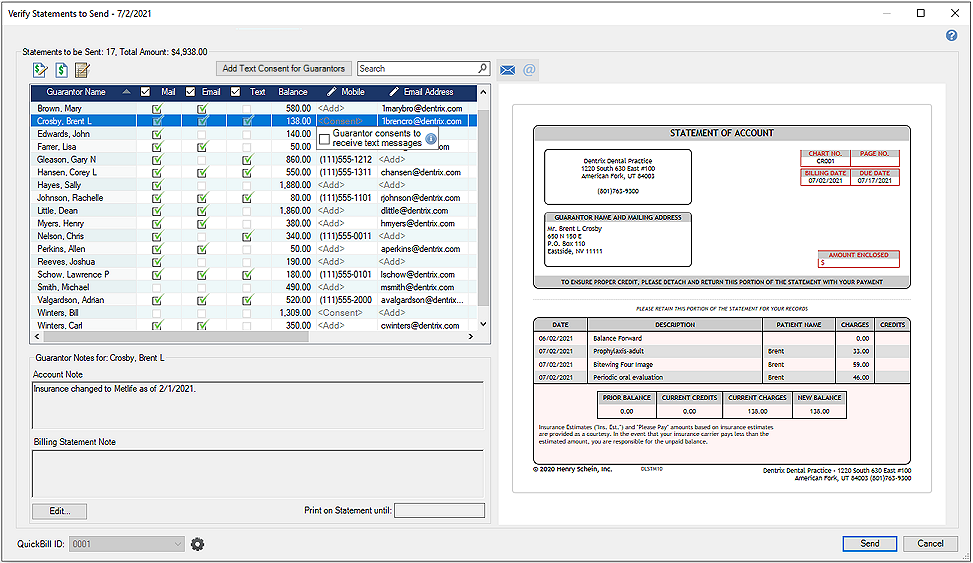
Easily enter missing information:
Email addresses or guarantor birthdates, which are required for statements to be delivered by email.
Mobile phone numbers and consent to send billing notifications by text, which are required for statements to be delivered by text.
Notes: To indicate consent to send billing notifications by text, do one of the following:
If applicable for a listed statement, click <Consent> in the Mobile column for the statement, and then select Guarantor consents to receive text messages on the prompt that appears.
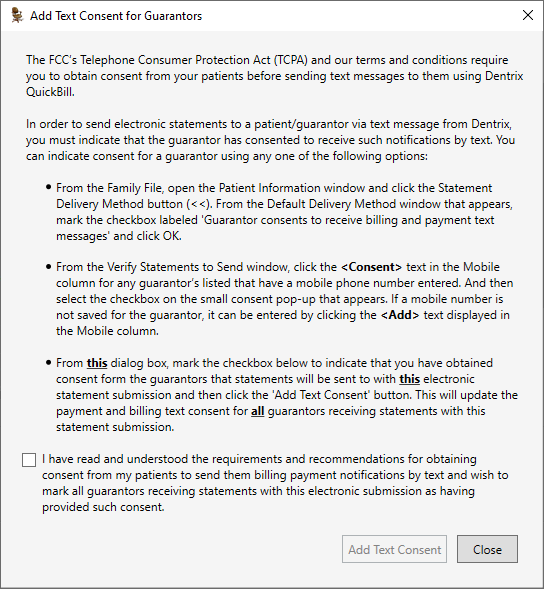
Click the Add Text Consent for Guarantors button to review the details and requirements for sending text messages to patients and to indicate that you have received consent from all guarantors who have a mobile number entered in Dentrix and want to receive statements by text message in the current statement submission.
3. After verifying statements, click Send.
A window appears, indicating the progress of the statements being sent electronically.
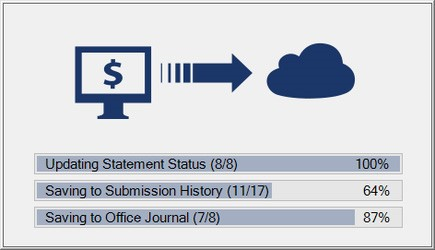
Once the electronic claims submission process is completed, a notification appears.
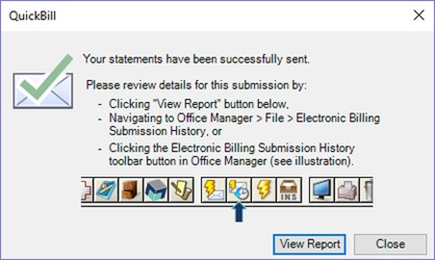
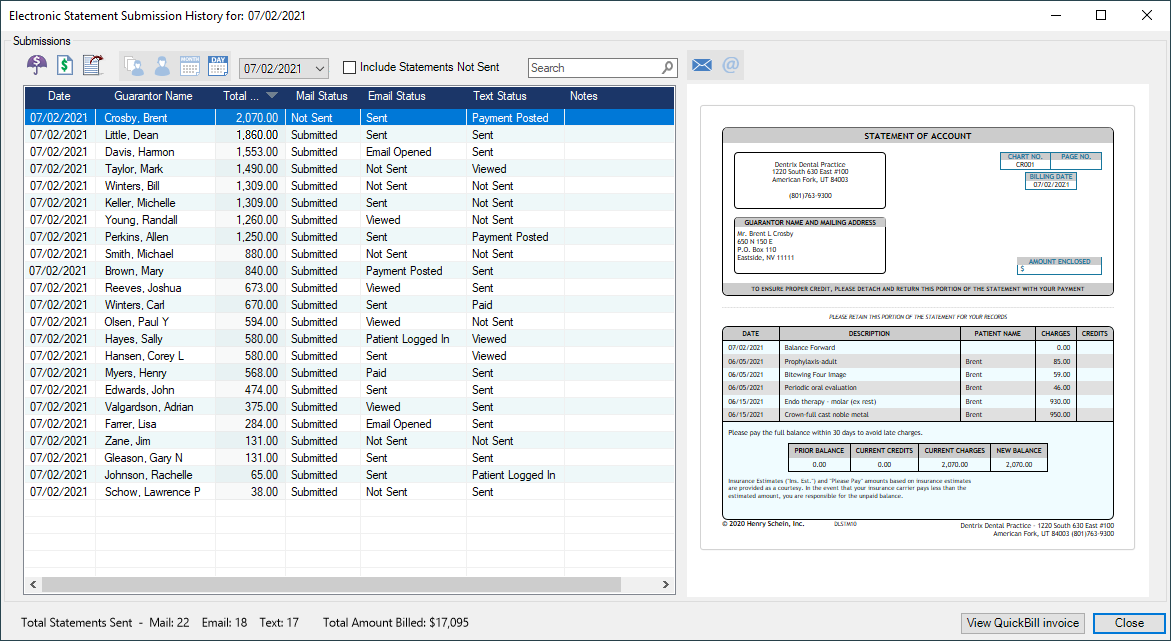
4. In the Electronic Statement Submission History window, view details for the completed electronic statement submission (or any previous electronic statement sent using Dentrix G7.4 or later), including the current status for each statement sent electronically.
Note: The Electronic Submission History feature replaces the electronic billing transmission reports that appeared in the Batch Processor after each submission in versions of Dentrix prior to G7.4.
Tips: You can access the Electronic Statement Submission History in the following ways:
By clicking the View Report button on the notification.
In Office Manager by clicking File > Electronic Billing Submission History.
In Office Manager, Family File or Ledger by clicking the Electronic Billing Submission History toolbar button.
You can select the following views in the Electronic Billing Submission History window using the buttons above the list box:
|
|
View Each Guarantor's Most Recent Submission |
|
|
View Submissions by Guarantor |
|
|
View Submissions by Submission Month |
|
|
View Submission by Submission Date |
The following statuses for statements sent electronically are displayed in the Mail Status, Email Status, and Text Status columns of the list box, as applicable:
For statements sent by "Mail":
Not Sent – Statement was unchecked by the user from the list of statements to send electronically.
Sent – Statement was successfully sent to the QuickBill server.
For statements sent by "Email" or "Text":
Not Sent – Statement was unchecked by the user from list of statements to send electronically.
Sent – Statement was successfully sent to the QuickBill server.
Accepted – Statement has been received to be processed and emailed to the guarantor/patient.
Processing – Statement is being processed to be emailed to the guarantor/patient.
Failed – Statement notification failed to be sent to the guarantor/patient.
Sent – Statement notification was successfully sent to the guarantor/patient.
Email Opened – Statement email has been opened by the guarantor/patient.
Statement Link Clicked – Link to view the statement has been clicked by the guarantor/patient.
Patient Logged In – Guarantor/patient successfully logged in to view the statement.
Viewed – Guarantor/patient viewed the statement.
Paid – Guarantor/patient made payment toward the statement.
Payment Posted – Statement payment has been successfully downloaded and posted to the Ledger.


