You can import eligibility and benefits data from the Appointment Book, the Appointment Information dialog box, or the Family File. If eligibility and benefits data are available to import, the eligibility icon appears as a green E on a white background (with a small red bubble in the upper-right corner of the icon). The following conditions trigger the display of the icon:
New patient eligibility request
Existing patient eligibility request has expired
Caution: Importing the eligibility and benefits data for one patient on a selected plan updates that data for all patients on that plan.
Important: Importing eligibility and benefits data is optional. If available, the following data are imported:
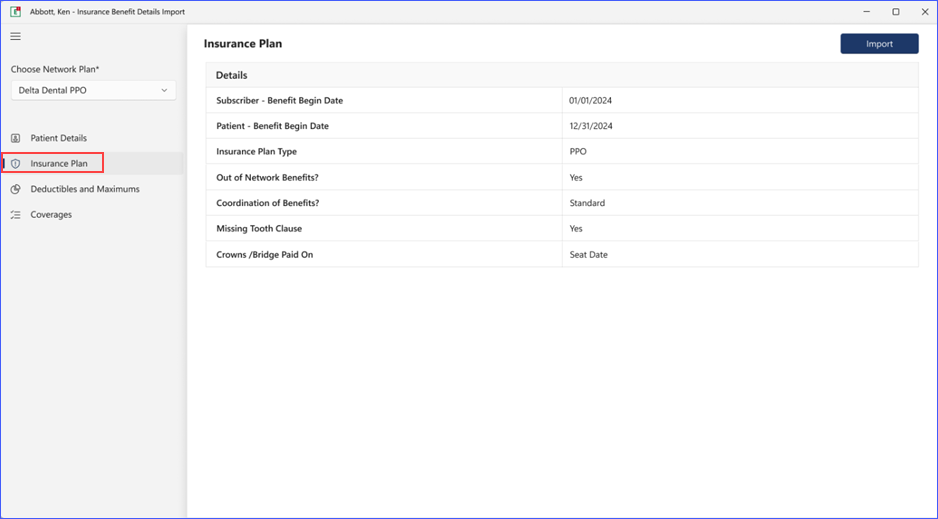
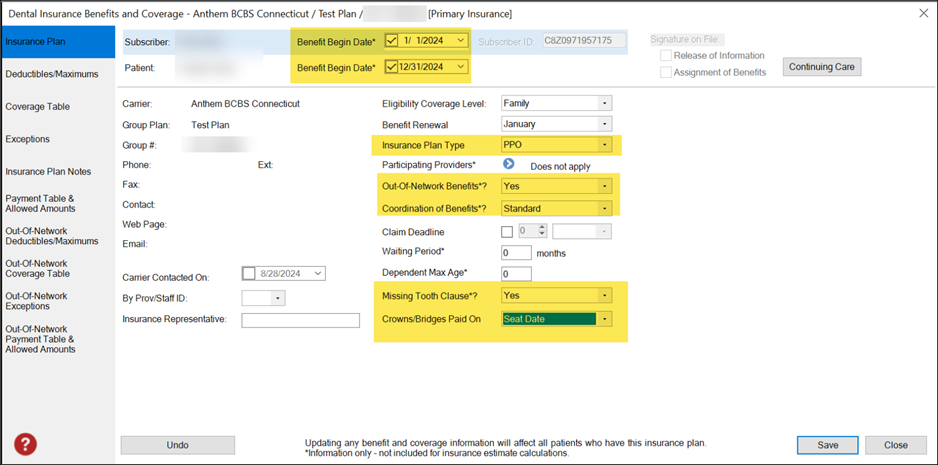
Insurance Plan – Benefit begin dates for subscriber and patient, insurance plan type, out-of-network benefits, coordination of benefits, missing tooth clause, and crowns/bridges paid on.
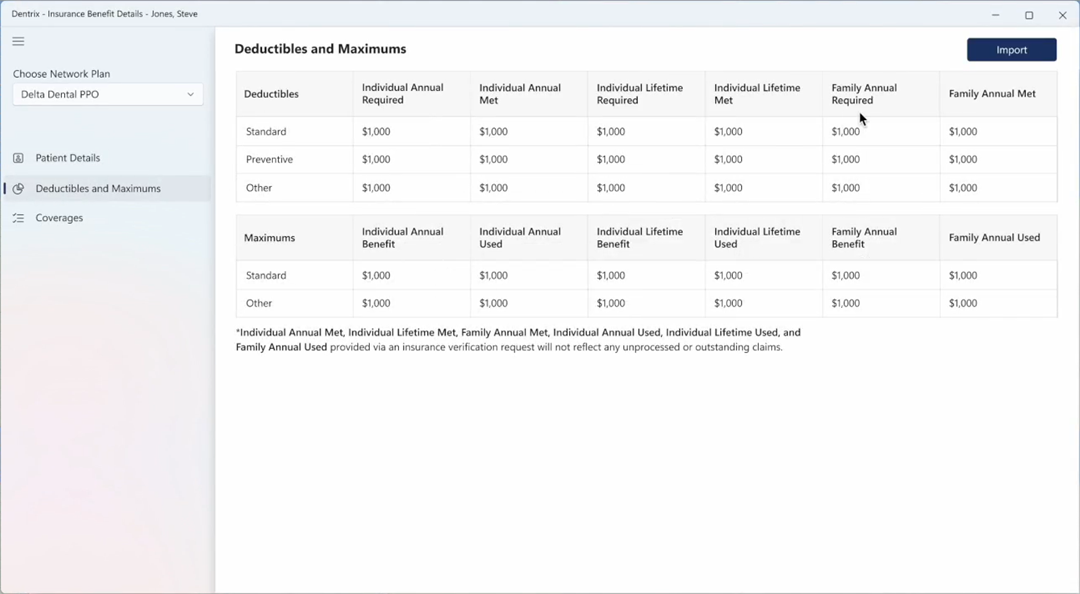
Deductibles – Individual annual required and met, Individual lifetime required and met, and Family annual required and met.
Maximums – Individual annual benefit and used, Individual lifetime benefit and used, and Family annual benefit and used.
Coverages – Beg/End Procedure Code range, Benefit category, Coverage %, Deductible that applied (preventive, for example), and Co-pay.
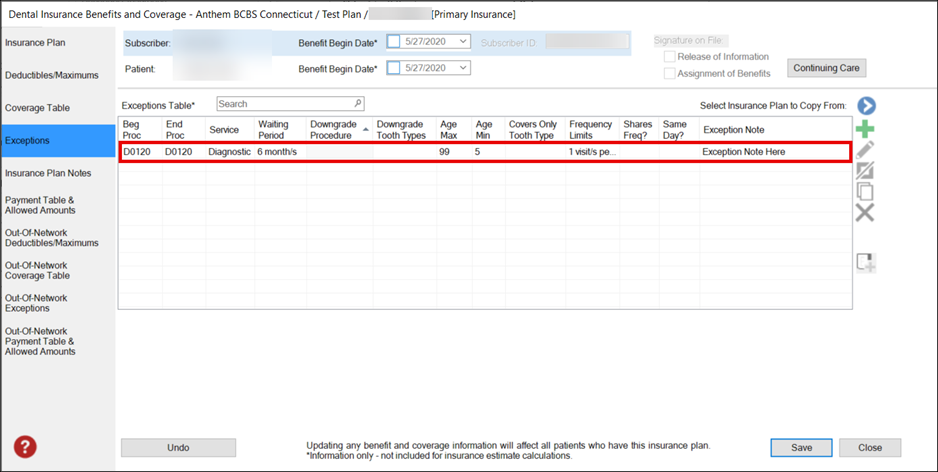
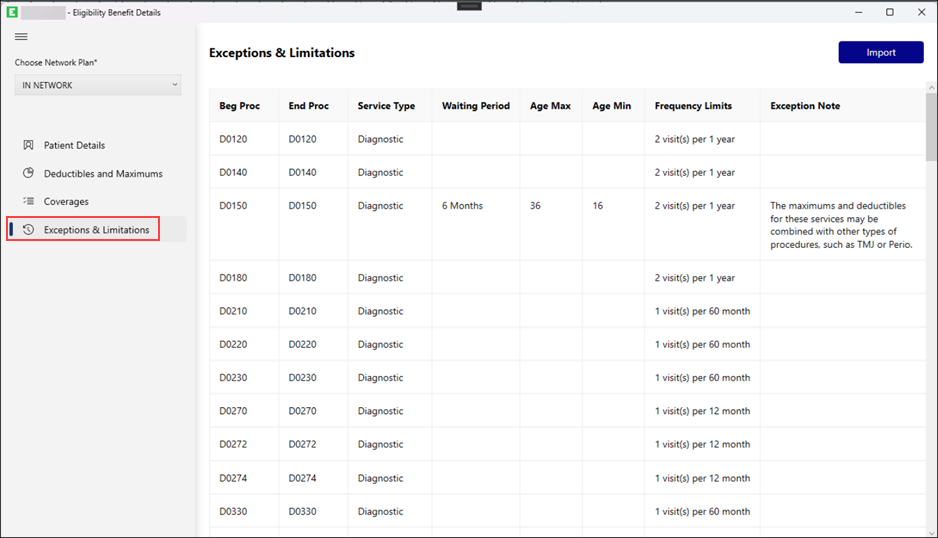
Exceptions & Limitations – Age (maximum and minimum), frequency limits, waiting period, and exception notes.
To import eligibility and benefits data
1. In the Appointment Book, Family File, or Appointment Information dialog box, click the icon.
The following menu appears.

2. Click Import Insurance Benefit Details.
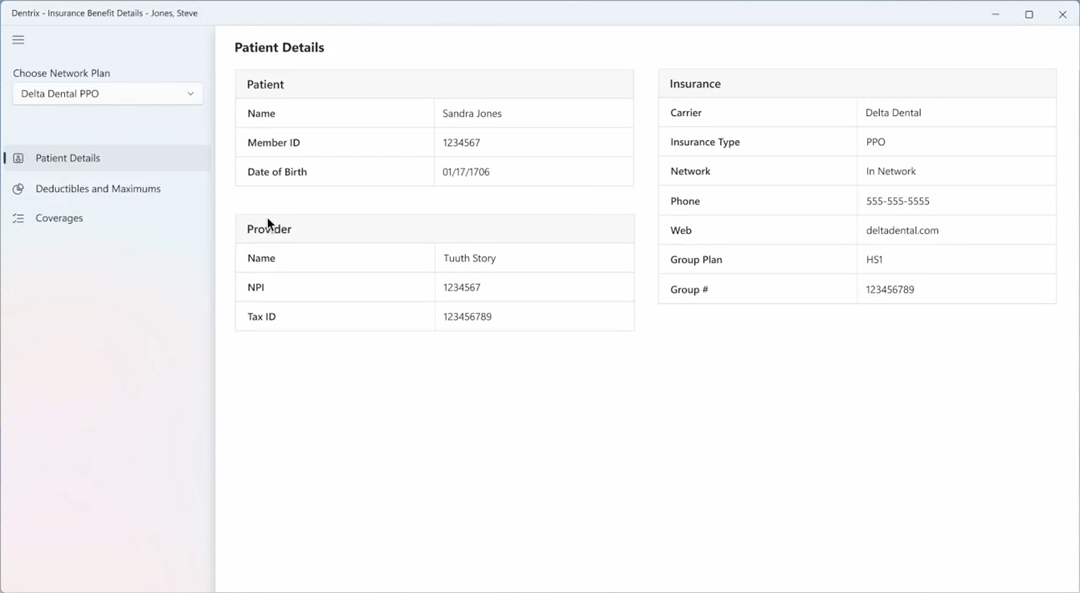
Note: The information under Patient Details is pulled from Dentrix, is for information only, and is not imported.
The Insurance Benefit Details dialog box appears.
3. Under Choose Network Plan, select the desired insurance plan from the list.
4. To review the data before importing, click the following tabs:
Insurance Plan
Deductibles and Maximums
Coverages
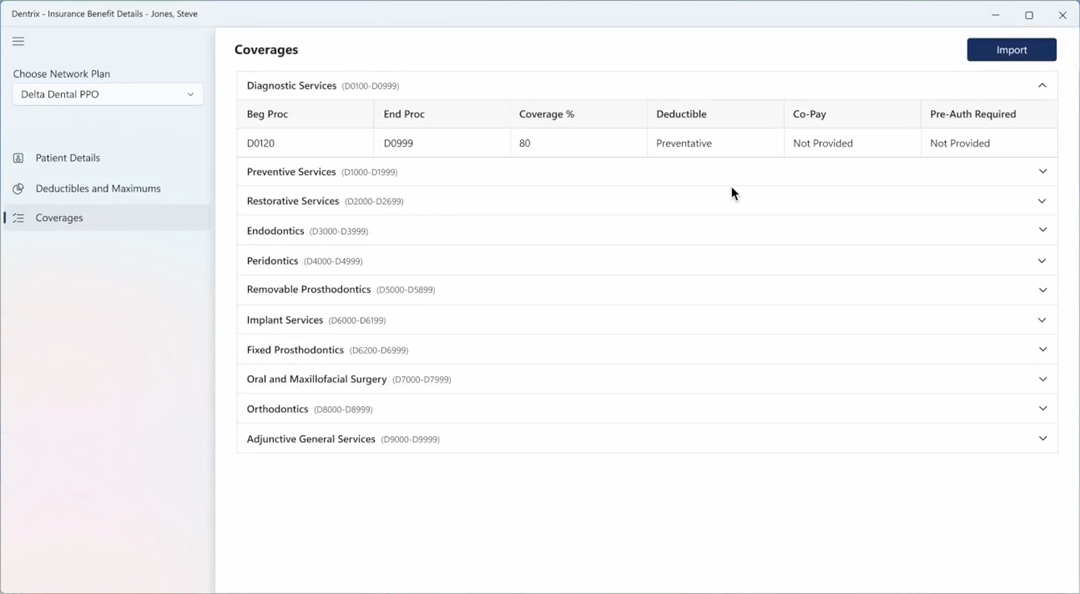
Exceptions & Limitations
5. To import the data, click the Import button.
The Do you want to Import? dialog box appears.
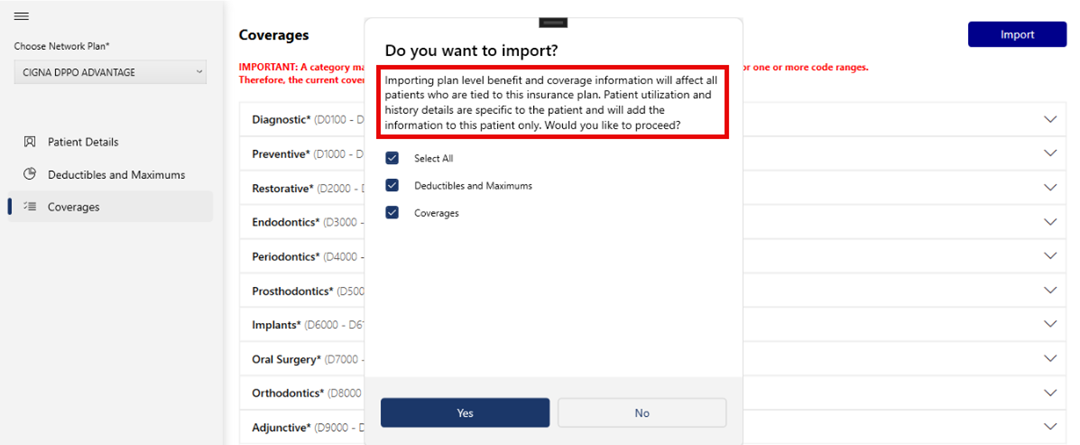
6. To import, click Yes.
Note: By default, all options are selected. To restrict the import of an option, clear the appropriate check box.
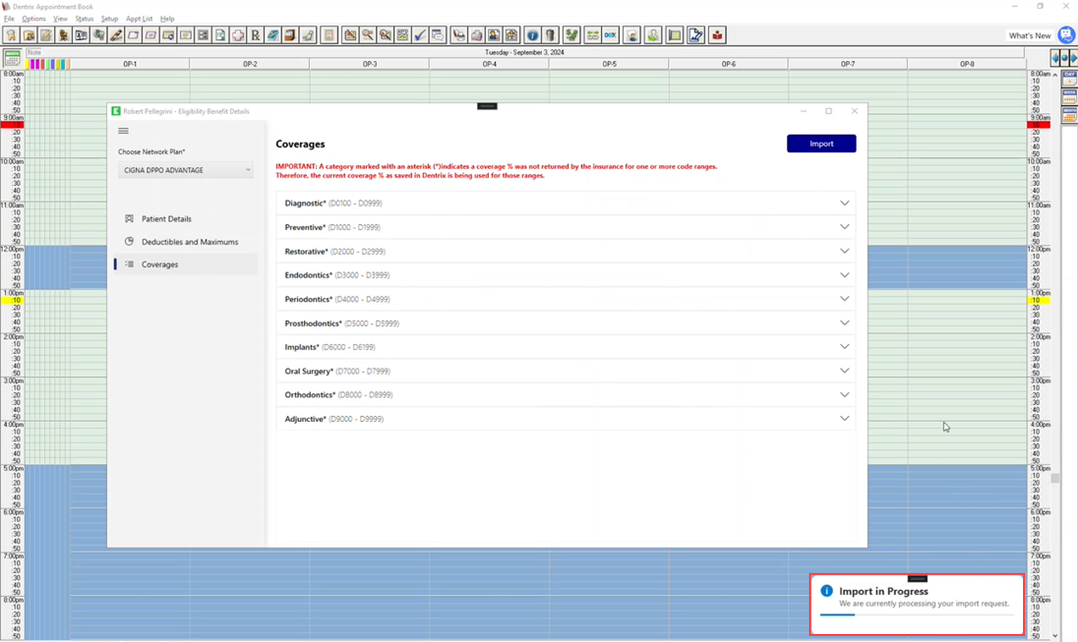
An import progress indicator appears in the lower-right of your screen.
If the import was successful, a green check mark appears next to the option or options you chose to import. You can review the changes in the Dental Insurance Benefits and Coverage dialog box.
Insurance Plan
Exceptions & Limitations