Before you can begin exporting totals using DXPort, you must select which totals you want to include and determine which adjustment types are to be applied to production and which are to be applied to collections. You can also select which payment types are to be included in the other collections category (such as credit card payment). (For more information on adding or customizing the adjustment and payment types in Dentrix, see Practice definitions.)
Warning: Adjustment and Payment types must not be moved after the initial accounting export; otherwise the data could be affected.
To set up the export options
1. In the Office Manager, click Analysis, and then click DXPort Setup.
The DXPort Setup window appears.
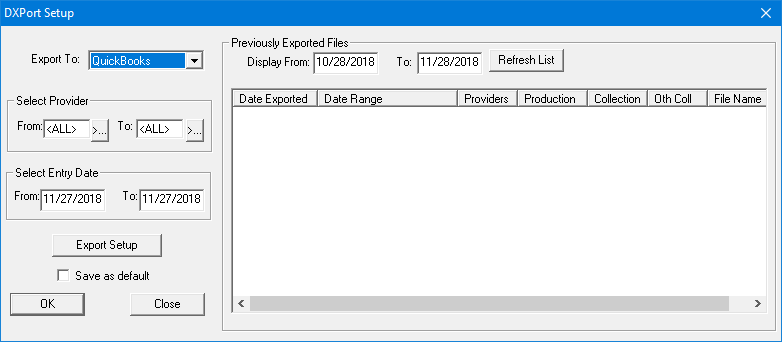
2. Click Export Setup.
The Export Setup dialog box appears.
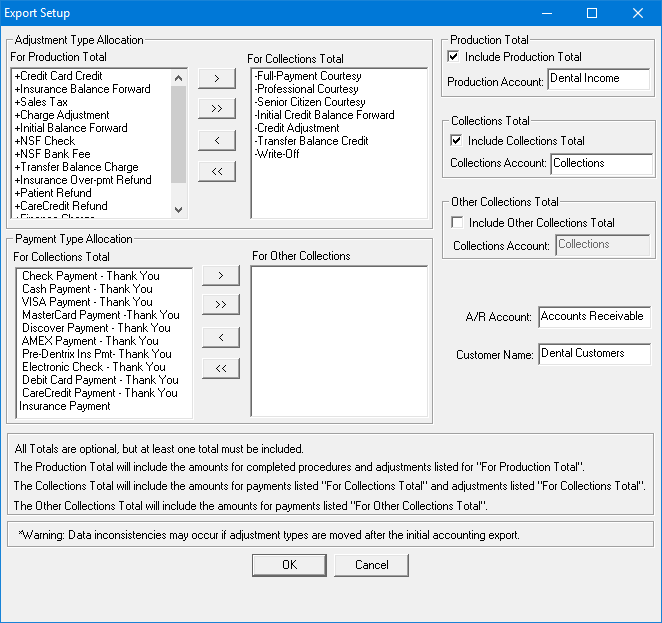
3. Select any of the totals (Production Total, Collections Total, and Other Collections Total) that you want to include in the export, and type the account name in the appropriate field.
Note: By default, all credit adjustment types appear in the For Production Total list, and all debit adjustment types appear in the For Collections Total list.
4. To move an adjustment type to a different pane, select it and then click the single left- or right-arrow buttons, or to move all types, click a double-arrow button.
Note: You cannot move Late Charge and Finance Charge from the For Production Total list.
5. To move a payment type to a different list, select it and then click the single left- or right-arrow buttons, or to move all types, click a double-arrow button.
Note: By default, all payment types appear in the For Collections Total list.
6. You can change the names of the following accounts:
A/R Account - Dentrix exports the production and collection totals to this account.
Customer Name or Customer ID - Dentrix exports the production and collection totals to this customer account.
7. Click OK.