
You can customize the types of entries the Office Journal displays through setting filters.
To customize what types of entries are displayed in the Office Journal
1. In the View menu in the Office Journal, click Filters.
The View Filters dialog box appears.

2. Under Select Journal Entry Types, do one of the following:
Select the entry types that you want to display from the list.
Select All to view all types of entries.
3. Under Select Provider/Staff, do one or more of the following:
Select the providers and/or staff from the list whose entries you want to view.
Select All to view entries by all providers and staff.
Select List Inactive to include the entries of providers and staff that you have set to inactive.
4. To change the default for when you want to start entries from, click the By Default Show Entries Starting drop-down arrow, and then click the desired option.
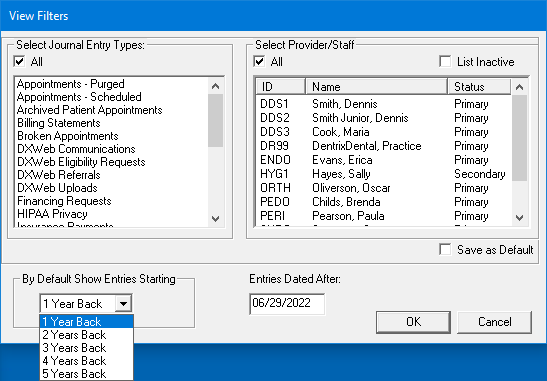
5. To only display items after a certain date, enter the cut-off date that you want in the Entries Dated After box.
6. To save your changes as the default for the next time you open the Office Journal, select Save As Default, and then click OK.
7. Click OK to return to the Office Journal with the selected settings.