
If you need to change a procedure code, you can search for it in the Edit or Delete Procedure dialog box.
To search for a procedure code
1. In the transaction log, double-click the procedure you want to edit or change.
The Edit or Delete Procedure dialog box appears.
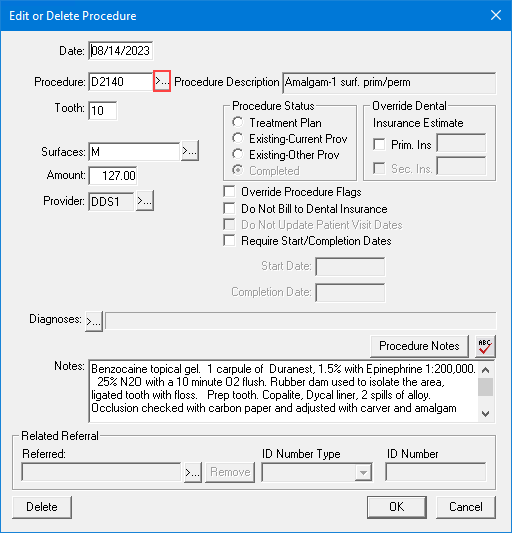
2. In the Procedure field, do one of the following:
· Type the procedure code.
· Click the search button.
The Select Procedure Code dialog box appears.
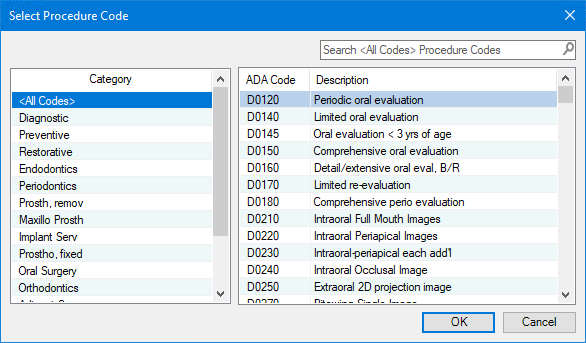
· In the Search text box, type the first few characters of the ADA code or description.
The codes most closely matching your search appear.
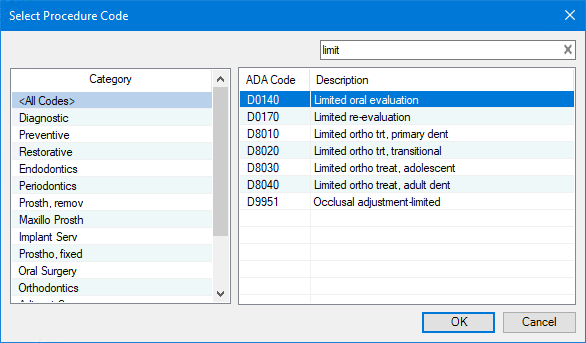
· Select the appropriate procedure code, and then click OK.
The procedure code, description, and fee appear in the Edit or Delete Procedure dialog box.
Note: You can also select a category, such as Diagnostic, and then search for the procedure codes or descriptions specific to that category.
3. If the procedure code requires additional treatment information, such as a surface type those in the appropriate fields.
Note: The following options may or may not appear in the Edit or Delete Procedure dialog box depending on the procedure code specified.
· Tooth Number - Type the appropriate tooth number in the Tooth Number field.
Note: If the tooth number you entered is higher than 51 and lower than 82, a warning appears to alert you that you entered an invalid tooth number and asks if you would like Dentrix to accept the tooth number as a supernumerary tooth. If the tooth number is 82 or higher, or 33 to 50, the invalid tooth number message appears. Click OK to enter a valid tooth number.
· Surfaces - Click the Surfaces search button and from the Surfaces Selection dialog box, select the appropriate surface, and click OK.
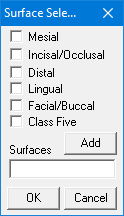
Tips: You can quickly enter surface selections by entering the first letters of the surfaces. For example, Type “MOD” in the Surfaces field to indicate the mesial, occlusal, and distal surfaces. If you are entering non-adjoining surfaces, select a surface and then click Add. Select the next surface and click Add. Repeat for as many surfaces as necessary. When you finish selecting surfaces, click OK.
4. Do one or more of the following:
· Amount - Type a new amount to change the amount that Dentrix charges automatically based on the patient's fee schedule.
· Provider - Click the search button to change providers.
· Do Not Bill to Dental Ins - Select if you do not want to include the selected procedure on an insurance claim. When Dentrix posts the procedure to the Ledger, an “X” appears in the Ins column.
· Override Procedure Flags - Select if you do not want Dentrix to correct the procedure code automatically according to the tooth number and selected surfaces.
· Related Referral - Enter a related referral source.
· Referred - Click the search button, select the appropriate referral source, and click OK.
· Remove - Click to remove the related referral from the procedures.
5. To post the procedure to the Ledger, click OK.
Tip: You can enter items into a treatment plan using the above steps and selecting Treatment Plan under Procedure Status.