You can determine which teeth have images associated with them from a patient’s clinical chart and progress notes.
To view images of selected teeth
1. Open the Patient Chart and select a patient.
If a tooth has an image, a small icon appears in the graphic/clinical chart for each tooth above or below the tooth number.
![]()
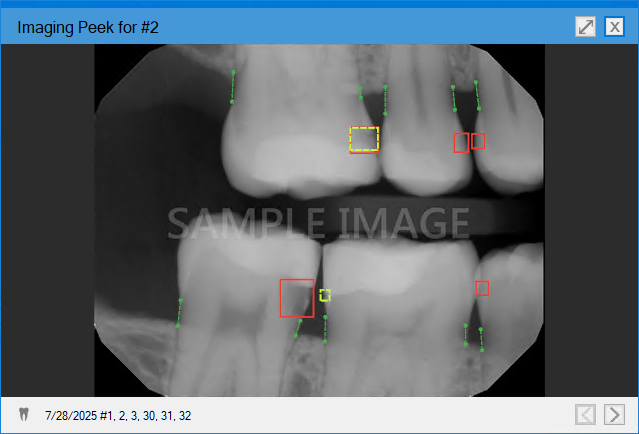
2. To view one or more teeth, select them in the graphic/clinical chart, and then click the small icon above or below the tooth number.
The Imaging Peek dialog box for the selected tooth or teeth appears.
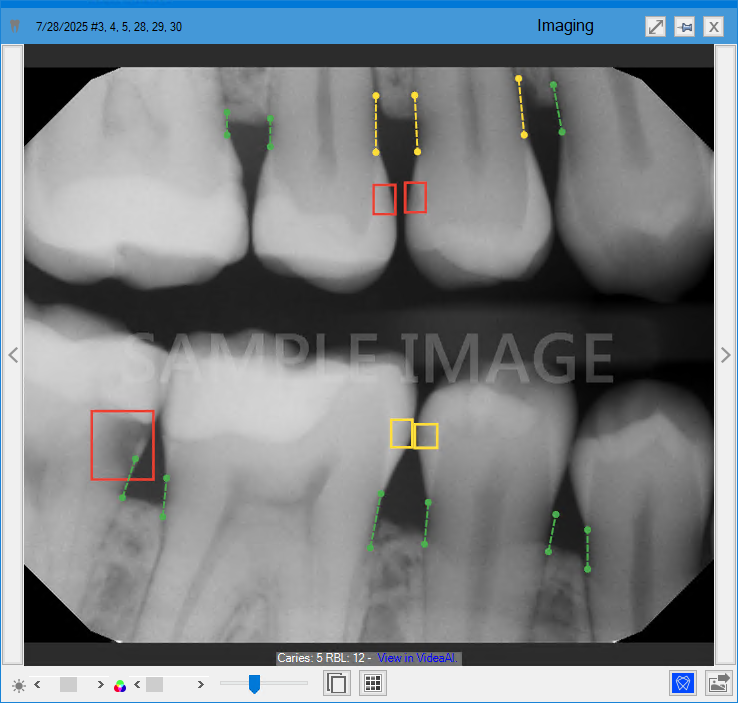
3. In the Imaging panel, click an image.
An enlarged view of the image appears. To move from one image to the next, click the Previous or Next button. You can use the icons at the bottom of the screen to reset or adjust the image gamma, reset or adjust the image contrast, adjust the zoom ratio, export the image, or launch the imaging software associated with the image.