
Dentrix Imaging supports acquiring intraoral scans from the MEDIT software bridge. You must install the Medit software on each Microsoft Windows workstation that uses the MEDIT software bridge.
Notes:
· Before installing any imaging devices or setting up the MEDIT software bridge, you must configure the acquisition agent application on each computer that you use to acquire images.
· This guide was last updated: 10/6/2025.
· Medit Link: v3.4.5 or later
· Medit Link: v3.1.4
· Acquisition Agent: v121.9370.xxxxx
To set up the MEDIT software bridge
1. Right-click the Acquisition Agent icon, and then click Preferences.
The Preferences dialog box appears.
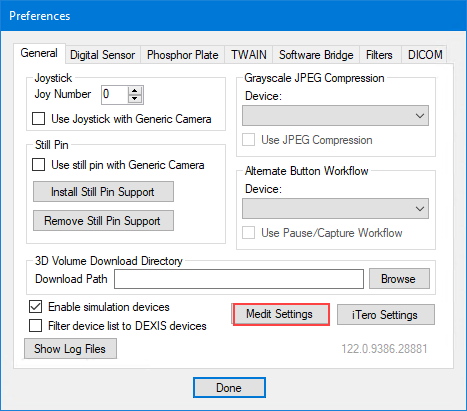
2. Click the General tab, and then click Medit Settings.
The Medit Settings dialog box appears.
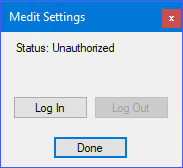
3. Click Log In.
The MEDIT Link dialog box appears.
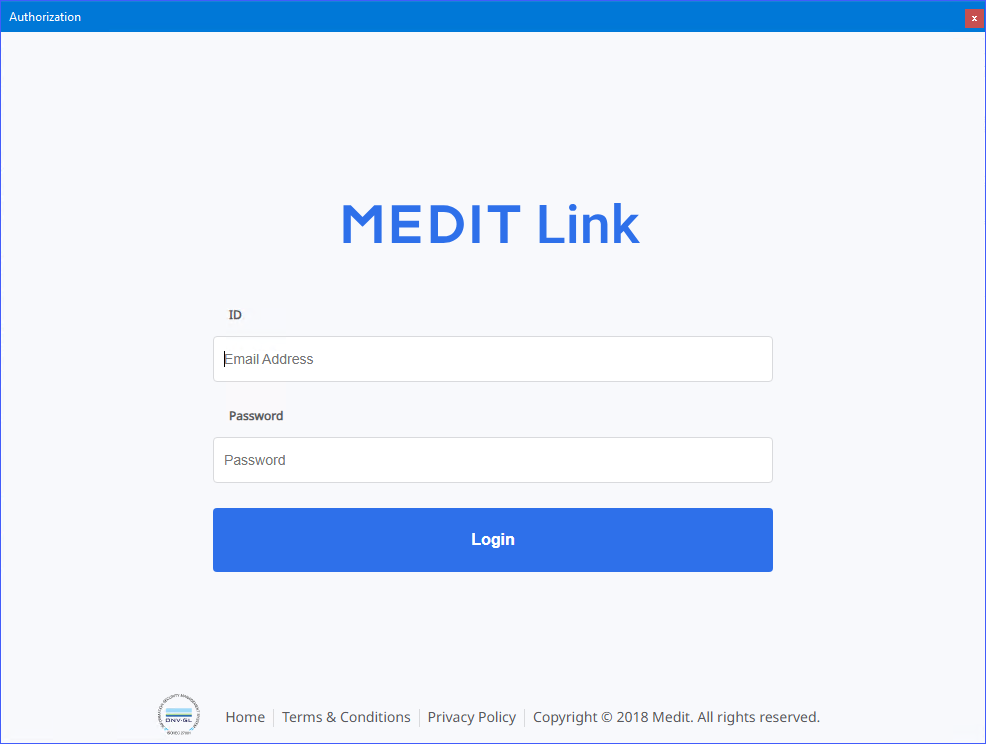
4. Enter your MEDIT credentials, and then click Login.
5. To close the Medit Settings dialog box, click Done.
6. Click Done again to close the Preferences dialog box.
Important: Currently, the MEDIT Link INI and DLL files are not distributed with the Acquisition Agent, so you must call Dentrix Support for access to these files. However, if MEDIT is configured for Smart Image, you can skip this step.
1. Get the following MEDIT Link files:
· MeditLinkAppSmartImage.ini
· Medit_SmartImage_x64.dll
· MeditPublic_AddinBase.Manifest
· MeditPublic_AddinBase_x64.dll
· SmartImage.png
2. Copy the files to the following folders:
Note: If the folders do not exist, create them.
· %ProgramData%\Medit\Medit Link Add-in
· MeditLinkAppSmartImage.ini
· C:\Program File (x86)\Dentrix
· Medit_SmartImage_x64.dll
· MeditPublic_AddinBase.Manifest
· MeditPublic_AddinBase_x64.dll
· SmartImage.png
Once the MEDIT software bridge is functional, you can test it by acquiring an image.
To acquire a test image
1. Open Dentrix Imaging, and then click the Acquire tab.
2. Click the Standard tab, and then click CAD/CAM Scan.
3. In the Acquisition method for this imaging exam menu, click Medit Software.
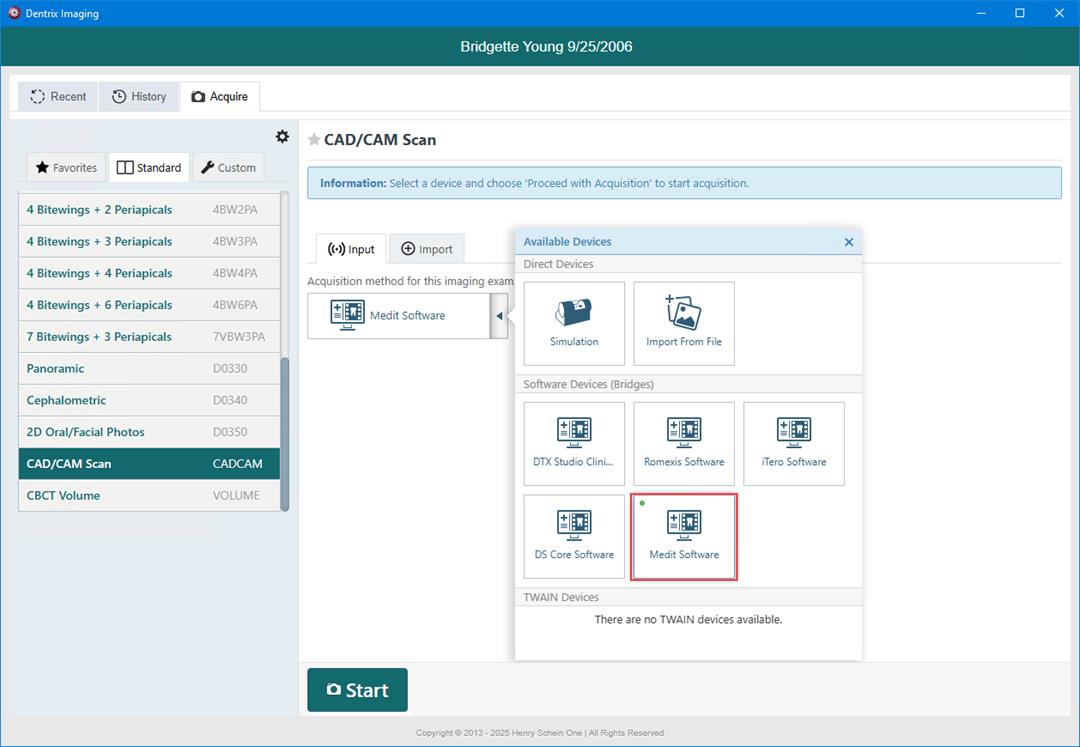
4. Click Start.
MEDIT Link opens and, if the patient did not exist in the Medit database previously, bridges the patient into it.
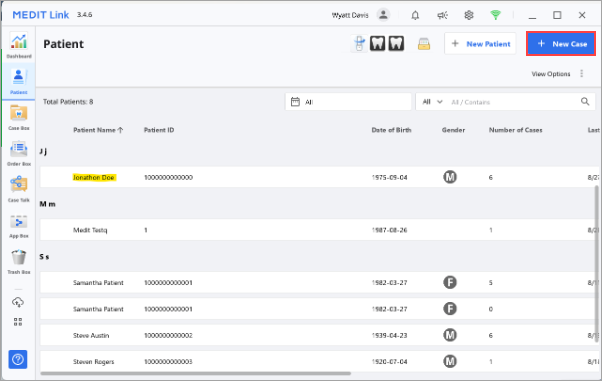
5. Select the patient from the list, and then click New Case.
The New Case Information dialog box appears.
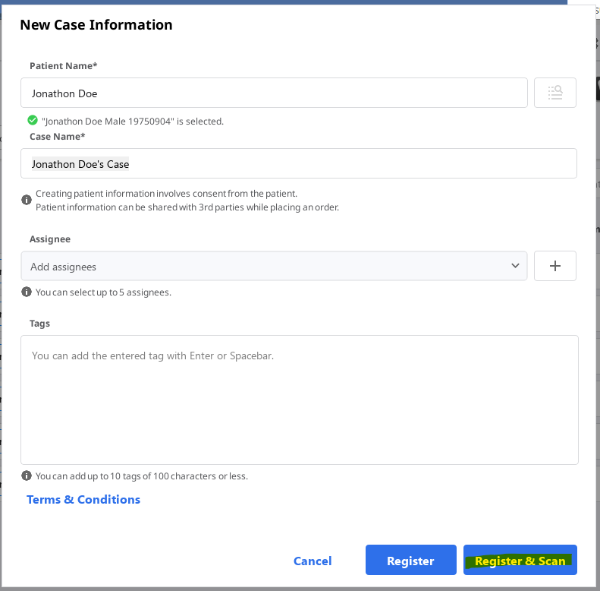
6. Click Register & Scan.
7. To open the Medit Scan software, click Scan.
8. Scan the needed segments, and then save the scan in Medit.
The scan processes.

9. When the scan's status changes to Scan Completed, return to Dentrix Imaging.