
Dentrix Imaging supports acquiring intraoral images from e2v intraoral X-ray sensors on computers running the Windows operating system. Drivers for the e2v sensor must be installed on each computer that the e2v sensor will be connected to.
e2v sensors are rebranded and sold by many companies under their specific brand names. The following devices work in Dentrix Imaging with e2v as the selected acquisition device:
· Dentimax Dream sensor
· EVA Select sensor
· Sota/Clio sensor
· XDR sensor
· Apteryx Tuxedo sensor (previous version is Hamamatsu, which is also directly supported by Dentrix Imaging)
· QuickRay HD sensor (previous version is Hamamatsu, which is also directly supported by Dentrix Imaging)
Notes:
· e2v and Progeny sensors are not able to function on the same machine. If you are changing from a Progeny sensor to an e2v sensor, see the Troubleshooting section at the end of the document.
· Before installing the e2v sensor, you must configure the acquisition agent application on each computer that you use to acquire images.
· This guide was last updated: 6/12/2025
To configure the correction files for e2v sensor drivers
1. Right-click the Acquisition Agent icon in the System tray, and then click Preferences.
The Preferences dialog box appears.

2. Click the Digital Sensor tab.
3. Under e2v, do one of the following:
· Copy the correction files to the specified folder.
· Click Browse, and then navigate to the folder in which the corrections files are stored.
Note: The calibration file requires the format: [serial number].raw. If there are any characters other than the serial number in the name of the calibration file, or if the file extension is anything other than .raw, the calibration file will not work. Renaming the calibration file to include only the serial number and changing the file extension to .raw should resolve the issue. For example, if the calibration file is named SN507244.cal, change it to 507244.raw. The following types of calibration files are possible: .raw, .cal, and .ffc.
The e2v sensor is now functional in Dentrix Imaging.
To acquire a test image
1. In the Imaging Procedures list, click Bitewing Single Image.

2. In the tooth selection chart, click the teeth you want to image.

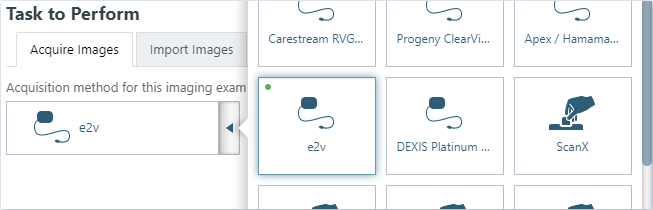
3. In the Acquisition method for this imaging exam menu, click e2v, and then click Proceed with Acquisition.
4. Acquire an image using the e2v sensor.
You can adjust e2v sensor settings in the acquisition agent Preferences dialog box.
To adjust e2v sensor settings
1. In the System tray, right-click the Acquisition Agent icon, and then click Preferences.
The Preferences dialog box appears.
2. Click e2v Settings.
The e2v Sensor Settings dialog box appears.

3. Change any of the following settings, and then click Done.
· Binned Acquisition –
· Sensor Gain –
· Integration Time –
· Triggering Level –
· Gamma Level –
4. Click the Filters tab.

5. Under Acquisition Filters, select e2v from the Device list, and then make any additional adjustments as needed.
6. Click Done.
If you are using a size-2 XDR sensor with the e2v integration, you must select the Rotate Size 2 Image (XDR) checkbox in acquisition agent preferences.
1. In the Preferences dialog box, click the Digital Sensor tab.
2. Click e2v Settings.
The e2v Sensor Settings dialog box appears.

3. Select Rotate Size 2 Image (XDR), and then click Done.
You may need to remove any Progeny sensor files that were previously used.
To remove the drivers for any Progeny sensors
1. Uninstall the Progeny Device Suite.

2. Uninstall the Acquisition Agent.


3. Reinstall the Acquisition Agent.

4. Restart the computer.
The e2v sensor should now work.
If the e2v sensor is not working properly, you can troubleshoot the issue.
To troubleshoot an e2v sensor
1. To ensure that the computer detects the sensor, open Device Manager and verify that the device appears.
2. In the Preferences dialog box, ensure that the Correction Path under e2v is correct and that the correction files are in the specified folder.
3. Restart the computer.