
You can restore a single image or a series of images that you previously deleted from a patient’s record. You can also restore any deleted images associated with a specific slot in a series.
To restore a deleted image
1. Open the Patient Chart, and select a patient.
All images pertaining to the selected patient appear in the Imaging panel.
2. In
the Imaging toolbar, click the Launch Dentrix Imaging icon ![]() .
.
The Dentrix Imaging window appears.
3. Click the Show Image History tab.
The selected patient’s imaging page opens to the history view, and the most recent image or series of images is selected by default.
4. To restore an entire series or exam, complete the following:
a. Click Narrow down the results, and then select Show Deleted.
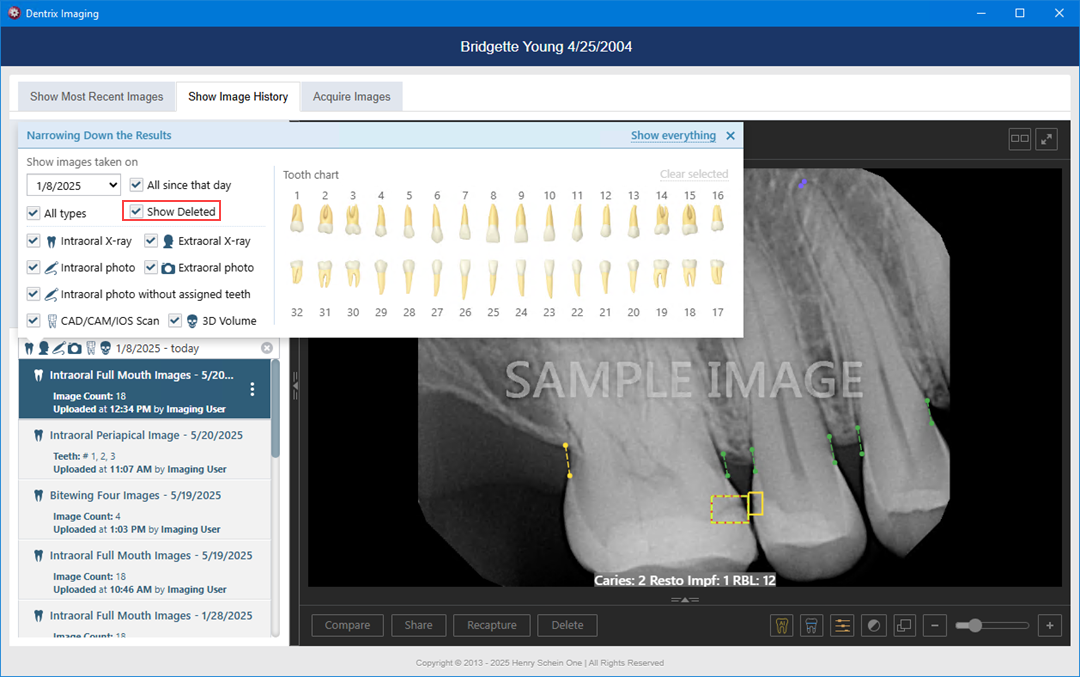
b. Close the Narrowing Down the Results menu.
In the Images list, Deleted appears before any series or exam that you have deleted.

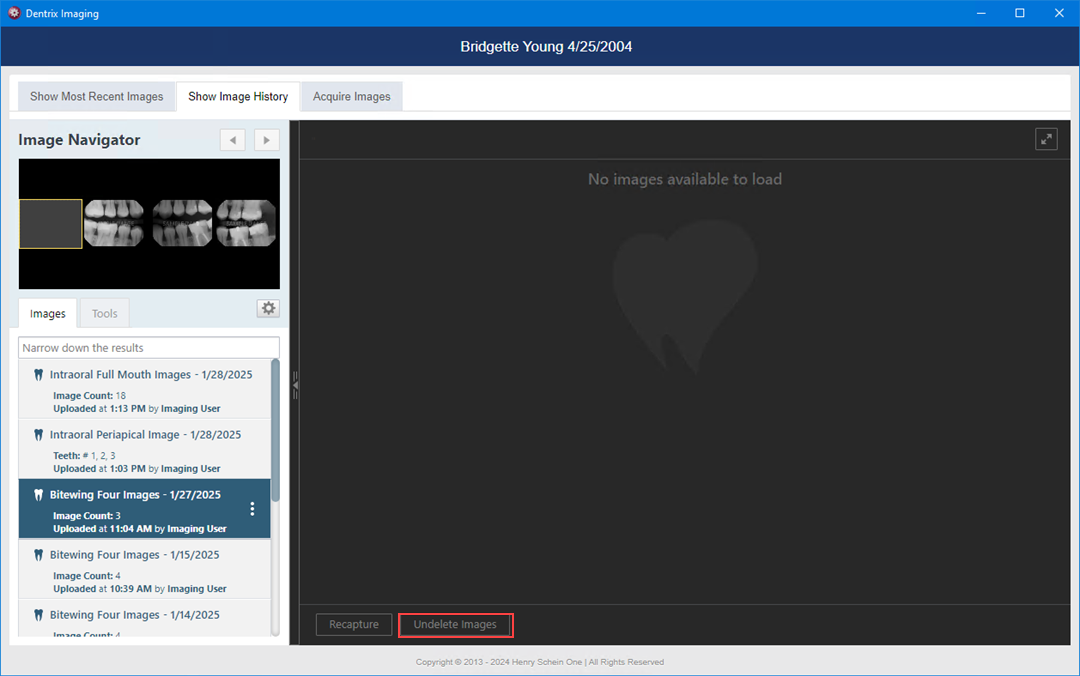
c. Select the series or exam that you want to restore, click the options menu, and then click Undelete exam.

The series or exam is restored to the Images list.
5. To restore an image or multiple images within a series, select the desired series, such as a full mouth series or bitewings, and then complete the following:
a. Under Image Navigator, select an empty box.
If a deleted image is associated with the selected slot, the Undelete Images button becomes available.
b. To restore the selected image, click Undelete Images.
The View Deleted Images dialog box appears.

c. To restore the displayed image, click Undelete Image.
Note: If there are multiple deleted images that you want to restore, click the Previous or Next buttons to navigate the images. For each image that you want to restore, click Undelete Image.