
You can have an imaging procedure appear as a favorite in Dentrix Imaging when you are acquiring images so that you have quick and easy access to that procedure. If you no longer want an imaging procedure to be a favorite, you can make it a non-favorite.
To remove an imaging procedure from the favorites list
1. Open the Patient Chart and select a patient.
All images pertaining to the selected patient appear in the Imaging panel.
2. In
the Imaging toolbar, click the Launch Dentrix Imaging icon ![]() .
.
The Dentrix Imaging window appears.
3. Click the Acquire tab.
The options for acquiring images become available.
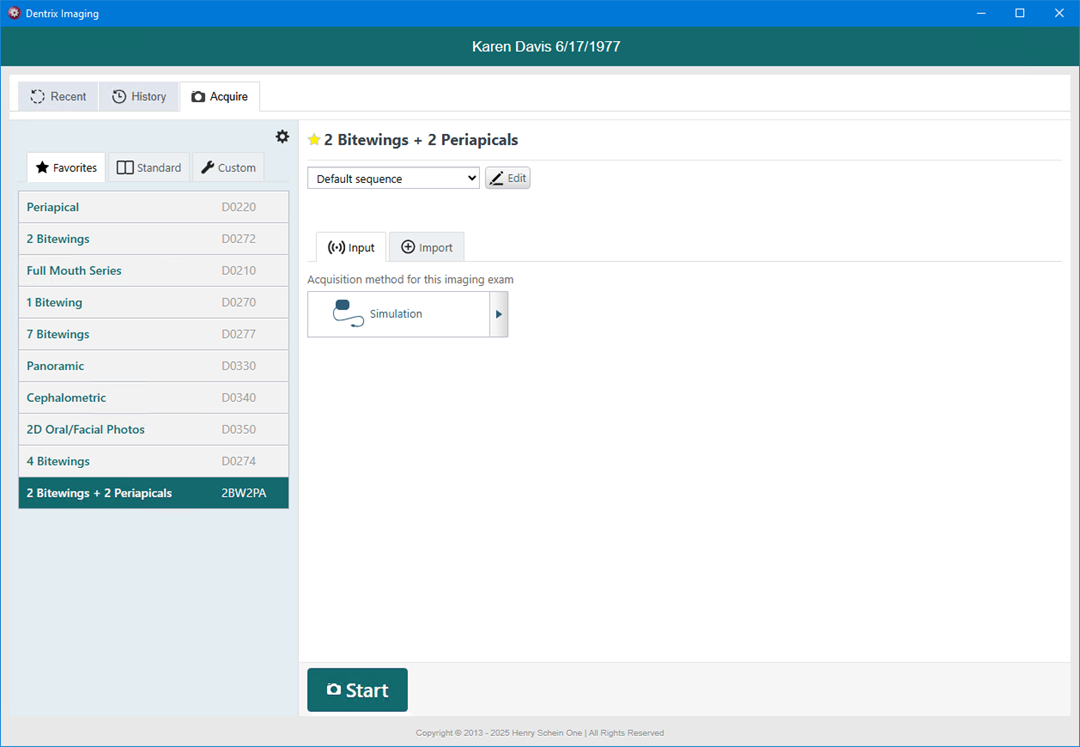
4. Click the Favorites, Standard, or Custom tabs, and then select the imaging procedure that you want to make a non-favorite.
Note: A favorite imaging procedure has a yellow star. A non-favorite has a gray star.
5. Click the yellow star next to the procedure name.
The star turns gray (you see this change only on the Standard or Custom tab), indicating that the imaging procedure is now a non-favorite. The procedure no longer appears in the Favorites list.