
You can export an image, a specific image of a series, or an entire series (such as a full mouth series).
Note: If you are using Dentrix Detect AI, those results will also appear when you export or share images or exams.
To export images
1. Open the Patient Chart and select a patient.
All images pertaining to the selected patient appear in the Imaging panel.
2. In
the Imaging toolbar, click the Launch Dentrix Imaging icon ![]() .
.
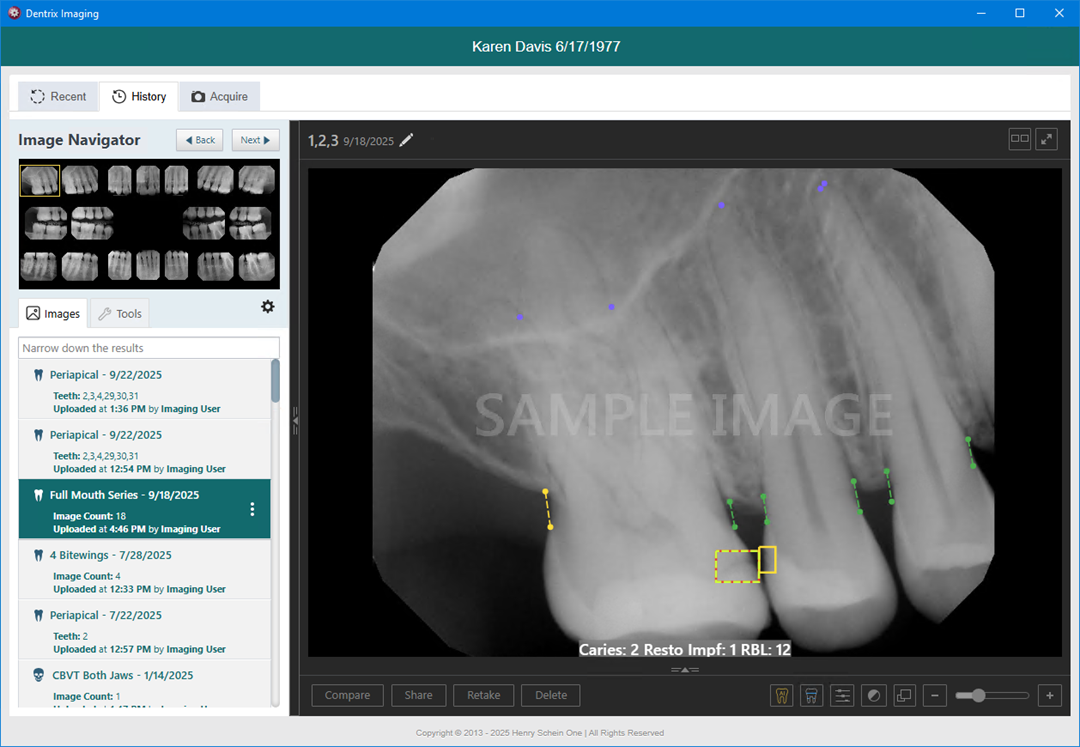
The Dentrix Imaging window appears with the History tab selected, and the most recent image or series of images (full-mouth or bitewings) selected by default on the Images tab.
3. Do one of the following:
· View an image or a series in the patient’s image history list.
a. On the Images tab, select an image or a series (such as a full mouth series or bitewings).
· View one of the patient’s most recent images.
a. Do one of the following:
· Click the Recent tab, and then double-click the image that you want to view.
· Click any single image (intraoral X-ray, intraoral photo, extraoral photo, extraoral X-ray, CAD/CAM scan, or 3D volume) or an image within a series (such as a full mouth series or bitewings).

The selected image (or the first of the selected series) appears in the viewing area.

4. If you are viewing a series (such as a full mouth series or bitewings), to view a different image of that series, under Image Preview, click an image. Otherwise, skip this step.

5. Do one of the following:
· Click Share.

· From the options menu of the image or series, click Share exam.

One of the following occurs:
· If the image being viewed is a CAD/CAM scan, the image is downloaded as a .ply file. Ignore steps 5 and 6.
· The Exam or Image(s) to be shared dialog box appears.

Note: If you used the Share button, by default, the Selected images(s) option under Share exam as is selected, and the image that was being viewed is selected (as indicated by the yellow box around the individual image in the preview area).

Note: If you used the Share exam menu option, by default, the Selected images(s) option under Share exam as is selected, and the series is selected (as indicated by the yellow box around the entire preview area).
6. Set up the following options:
· Include image enhancements – Select this check box to apply an enhancement, which adds a balance of sharpening and contrast levels that affects the overall sharpness and contrast, to any of the images being exported that have enhancement applied to their originals. Any images being exported that do not have enhancement applied to their originals will not be exported with enhancement. Clear this check box to not enhance any of the images being exported even if enhancement has been applied to their originals.
· Include annotations and measurements – Select this check box to include any annotations or measurements that were added to the images being exported. Clear this check box to export the images without the annotations and measurements.
· Export as JPEG (Otherwise PNG) – Select this check box to export the selected images as .jpg files. Clear this check box to export the selected images as .png files. If you are exporting multiple images, they will be saved as individual images in one compressed folder.
· Share exam as – For a series, do one of the following:
· To export the series as one file that contains all the images, select the Entire exam in one image option. A yellow box appears around the entire preview area to indicate that the series is being exported.
· To export each image in the series as an individual file, select the Entire exam in separate image(s) option. A yellow box appears around the entire preview area to indicate that the series is being exported.
· To export only some of the images in the series, each as an individual file, select the Selected image(s) option, and then click the desired images in the preview area. Yellow boxes appear around the selected images to indicate that those images are being exported. If necessary, you can click a selected image to remove the yellow box unless only one image is selected.
Note: If the series is selected (the entire preview area has a yellow box around it), and you click an image in the series, the Selected image(s) option is selected automatically.
7. Click Export.
The images are downloaded.